How to Apply Ceramic Coating at Home Correctly: Step-by-Step DIY Guide
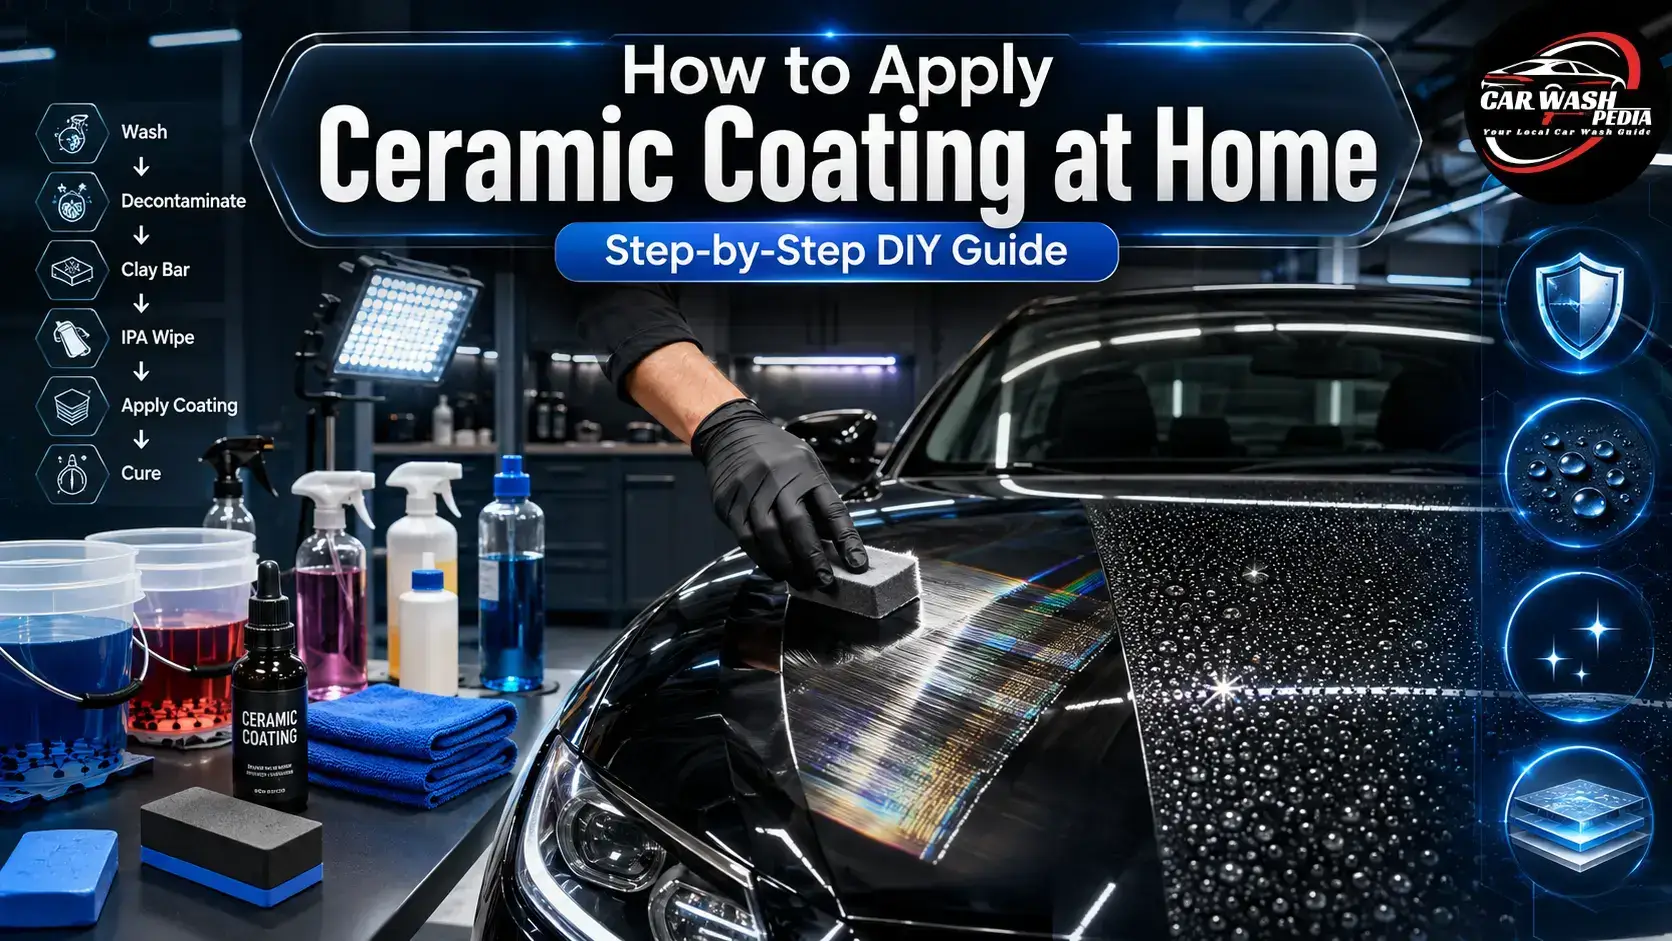
I paid $80 for a DIY ceramic coating kit. Then I ruined the hood on my first attempt. Not because the product was bad, not because ceramic coating is too difficult for home use, I ruined it because I did not know how to apply ceramic coating properly. I applied the coating in my driveway on a warm afternoon, worked panels that were too large, and had no idea what the flash window looked like until I was already buffing too late. The result was a network of hazy streaks across the hood that required a machine polisher and a full afternoon to correct.
Here is what nobody tells you before you open that kit. Knowing how to apply ceramic coating correctly is less about the coating itself and more about everything that happens before and during the process. The product accounts for maybe 20% of the outcome. The other 80% is preparation, environment, and technique.
This guide covers all of it. Every tool you need, every prep step in the right order, every application mistake worth avoiding, and exactly what to do from the moment you start washing to the day the coating reaches full cure. If you follow this process, your first DIY ceramic coating application is absolutely achievable, and it will last.
How Do You Apply Ceramic Coating at Home?
Here is the short version for those who want the full picture before diving into the details.
- Wash the car thoroughly with a pH-neutral, wax-free shampoo, then decontaminate the paint using an iron remover spray, a clay bar treatment, and a final wipe-down with diluted isopropyl alcohol to leave the surface completely clean and chemically bare before the coating touches it.
- Apply the ceramic coating in small sections of roughly 2 square feet at a time using a suede applicator block in a crosshatch pattern, horizontal strokes first, then vertical over the same area, using only 4-6 drops of product per section to keep the layer thin and even.
- Watch the treated surface under an inspection light until you see a faint rainbow shimmer or a subtle haziness appear across the panel, which signals that the carrier solvent is evaporating and the SiO2 is beginning to bond, then immediately level the coating using a clean, dry microfiber towel with light overlapping strokes.
- After the entire vehicle is coated, keep the car indoors in a dry, dust-free environment for a minimum of 24-48 hours while the coating completes its initial cure and begins cross-linking with the clear coat.
How Long Does It Take to Apply Ceramic Coating at Home?
The full process, done correctly, takes between 6 and 10 hours total depending on your vehicle size and paint condition. The prep work, washing, decontaminating, and panel wiping, takes considerably longer than the coating application itself. Most beginners underestimate this and rush the prep. That is where most DIY ceramic coating failures begin. Plan for a full day minimum, and do not start unless you can finish.
Before You Start: Is DIY Ceramic Coating Right for You?
Before you order a kit and clear out your garage, spend five minutes answering this question honestly. Ceramic coating at home is achievable for most car owners, but not for all cars, all paint conditions, or all situations. Getting this decision right before you start saves you from a costly and time-consuming correction job afterward.
What You Can Realistically Expect as a Beginner
Consumer-grade ceramic coating kits have improved significantly in the last few years. Modern SiO2-based DIY formulas are specifically engineered to give first-time applicators a workable flash window, a forgiving leveling stage, and a genuine chemical bond to the clear coat. You do not need professional training to use them correctly.
What you do need is patience, the right environment, and a realistic understanding of what the product delivers.
A first-time DIY ceramic coating application on a clean, reasonably well-maintained car is an achievable weekend project. The coating itself, the actual application of product to paint, typically takes 2-3 hours for a standard-size vehicle. The prep work that makes it work correctly takes considerably longer. Washing, iron decontamination, clay bar treatment, optional paint correction, and the final IPA wipe-down together account for 4-6 hours of the total process.
Most beginners read about ceramic coating and focus on the application. The professionals who do this work every day focus almost entirely on the preparation. That mindset shift is the difference between a coating that bonds correctly and lasts 2-3 years, and one that fails within months.
On durability: a properly applied consumer-grade ceramic coating typically lasts between 1 and 3 years with regular maintenance. Professional-grade coatings applied by a certified installer, using higher SiO2 concentration formulas under controlled shop conditions, typically last between 3 and 7 years. That gap is real and worth understanding before you decide which route to take.
When DIY Makes Sense vs. When to Go Professional
This is not a decision based purely on budget. It is a decision based on your car’s current paint condition, your available workspace, your color, and your honest assessment of your own patience with detail work.
Use this comparison to make the right call before you commit either way.
| Choose DIY If | Choose Professional If |
|---|---|
| Your car is light-colored – silver, white, or gray | Your car is dark-colored – black, navy, or dark gray |
| Paint is already in good condition with minimal swirls | Paint needs significant correction before coating |
| You enjoy hands-on car care and have done basic detailing before | You have no prior detailing experience at all |
| You have a covered garage or shaded indoor workspace | You have no controlled indoor workspace available |
| Your total budget is under $300 | Your vehicle is luxury, exotic, or high-value |
| You have a full weekend available with no time pressure | You need the car back in service within 24 hours |
A few things in this table deserve extra explanation because they are the factors that push the most beginners toward a result they regret.
- Paint color matters more than most people realize. On a silver or white car, a minor application error, like a slight high spot or a faint streak, is nearly invisible in normal lighting. On a black or dark navy car, the same error is visible from 10 feet away in direct sunlight. Dark paint amplifies every imperfection the coating captures. If you own a dark-colored car with existing swirl marks and you have no experience with a dual-action polisher, a professional application is the more cost-effective decision in the long run.
- Your workspace determines your outcome before you open the kit. Ceramic coating applied outdoors, in a dusty environment, in direct sun, or at temperatures above 85 degrees Fahrenheit is not a DIY project, it is a set-up for failure. The coating flashes too fast to level correctly, dust and insects embed in the surface, and the bond quality suffers. If a clean, temperature-controlled indoor space is not available to you, address that before purchasing any product.
- The cost gap is real but not always as large as it looks. A realistic DIY budget, including kit, prep chemicals, clay bar, microfiber towels and an inspection light, runs $150-300 depending on what you already own. A professional application on a mid-size vehicle runs $700 to $1500 or more depending on paint condition and the coating system used. If your paint needs significant correction before coating, add $150 to $500 to either route. Understanding the full cost picture on both sides helps you make the right decision for your specific car.
For a full breakdown of what each route actually costs in 2026, including paint correction add-ons and what drives professional pricing, read our complete ceramic coating cost guide.
The Honest Bottom Line
DIY ceramic coating works. Thousands of car owners apply it successfully at home every year. The ones who get a good result share two things in common: they did not rush the prep, and they applied in a controlled environment.
The ones who come away disappointed almost always skipped one of those two things.
If you are reading this guide, taking the time to understand the process before touching the product, and have a suitable workspace, you are already better positioned for a successful first application than most beginners who open the kit and start applying on a Saturday morning without any preparation.
What You Need: Complete Tools and Materials Checklist
One of the most common reasons a first-time ceramic coating application goes wrong has nothing to do with technique. It comes down to starting without the right tools and then improvising halfway through. Once the coating is on the paint, there is no pausing to run to the store. You need everything ready before the process begins.
This checklist covers every item in the order you will use it, from the first wash bucket to the final leveling towel. It also tells you exactly how much of each item to have on hand, because running out of clean microfiber towels during the buffing stage is one of the most avoidable mistakes in the entire process.
Required Items – Do Not Start Without These
These are not optional. Every item in this table serves a specific function in either the prep or the application stage. Skipping or substituting any of them risks the quality of your final result.
| Item | Quantity Needed | What It Does |
|---|---|---|
| pH-neutral, wax-free car wash shampoo | 1 bottle | Cleans surface without leaving wax or silicone residue that blocks the coating bond |
| Wash buckets with grit guards | 2 buckets | Two-bucket wash method prevents dirt particles from scratching paint during washing |
| Wash mitt – microfiber or chenille | 1 mitt | Safe paint contact during washing – do not use sponges |
| Iron decontamination spray | 1 bottle | Dissolves embedded brake dust and ferrous particles that washing cannot remove |
| Clay bar kit | 1 kit (includes clay and lubricant) | Removes bonded surface contamination left after chemical decontamination |
| Isopropyl alcohol – diluted to 15-20% | 1 spray bottle | Final surface wipe-down that removes all oils and residues before coating |
| DIY ceramic coating kit | 1 kit | The coating product – match the formula to your vehicle surface type |
| Suede applicator blocks | 2-3 blocks | Applies coating in a thin, even layer – suede holds and deposits product correctly |
| Microfiber leveling towels – high GSM | 8-12 towels | Used one pass at a time to level the coating after flash – do not reuse on fresh panels |
| Nitrile gloves | 1 pair minimum | Ceramic coating bonds to skin – protect your hands throughout the process |
| LED inspection light or work light | 1 light | Essential for identifying flash, high spots, and bare patches during application |
| Microfiber drying towel – large | 1-2 towels | Drying after the prep wash – must be completely clean before use |
A few of these items need more explanation than a table cell can provide, because the difference between the right choice and the wrong choice matters to the final result.
- The shampoo matters more than most people expect. A standard car soap that contains wax additives or gloss enhancers deposits a thin residue on the paint surface. Even after the IPA wipe-down, traces of that residue can interfere with the coating bond. Use a dedicated pre-coating shampoo or a strip wash product, these are specifically formulated to remove existing waxes, sealants, and silicones from the surface before decontamination begins.
- Suede applicator blocks are not interchangeable with other pad types. The suede microfiber surface on a ceramic coating applicator is engineered to hold the liquid without absorbing it and to deposit a thin, even layer across the paint. Foam pads, cotton pads, and regular microfiber cloths do not work the same way. They absorb product rather than depositing it, which leads to uneven coverage and inconsistent flash times across the same panel.
- Microfiber towel quantity is not a suggestion. Eight to twelve dedicated leveling towels sounds like a lot until you are working through a full-size SUV and realize you have used seven towels before reaching the rear quarter panels. Each towel should be used for one or two wipe passes, then folded to a clean section or replaced entirely. A used towel dragged across a fresh panel deposits cured coating residue and creates streaks that require correction to remove.
- The inspection light is the most underestimated item on this list. The flash window, the point at which the coating is ready to level, is subtle. It appears as a faint rainbow shimmer or a slight change in surface reflectivity under direct light. In the ambient lighting of a typical garage, it is nearly invisible. Under an LED work light held at a low angle to the panel surface, it is clearly visible. Without this light, you are guessing at the most critical moment in the entire application process.
Recommended but Not Mandatory
These items are not required for a successful first application, but they meaningfully improve either the prep quality or the long-term durability of your result.
- Dual-Action Polisher with a Light Finishing Pad: If your car has visible swirl marks, fine scratches, or light oxidation, a DA polisher with a finishing polish removes the majority of those defects before the coating goes on. This is the most impactful optional investment you can make before applying ceramic coating, because the coating will lock in whatever surface condition it finds. You do not need a professional-grade machine polisher. A mid-range entry-level DA polisher is sufficient for light correction work on a daily driver.
If you do not have a polisher and cannot borrow one, at minimum do a thorough hand polish with a finishing product applied by hand pad before the IPA wipe. It will not produce the same result as a machine, but it removes surface oxidation and reduces the visibility of light swirls before they get sealed in. - Panel Prep Spray: A dedicated panel prep or surface prep spray is a pre-formulated alternative to mixing your own IPA dilution. These products are designed specifically for coating prep and contain the correct concentration of isopropyl alcohol alongside other surface-cleaning agents. They are slightly more forgiving to use than a DIY IPA mix because they are pre-balanced for the task. If you are not comfortable mixing IPA dilutions precisely, a panel prep spray removes that variable entirely.
- Ceramic Booster Spray: A ceramic booster or maintenance topper spray is applied to the cured coating every 3-6 months after application. It partially replenishes the hydrophobic layer as the top surface gradually wears from washing and environmental exposure. Including a booster in your initial purchase means you already have the maintenance product on hand when the coating needs its first refresh, usually around the 3-month mark after full cure.
What to Skip – Items That Cause Problems
These are products and materials that beginners commonly reach for because they seem logical. Each one causes a specific, well-documented problem in the ceramic coating process.
- Dish Soap: Dish soap strips wax and sealants aggressively, which might seem like a useful property before coating prep. The problem is that dish soap also strips protective additives from rubber seals, plastic trim, and door gaskets. It leaves a chemical residue that does not fully rinse from paint in a single pass and can interfere with coating adhesion on areas with residue traces. Use a dedicated strip wash or pre-coating shampoo instead.
- Regular Terry Cloth Towels: Terry cloth has a rough surface texture with loops that are too coarse for paint contact. On a freshly decontaminated surface that you are about to coat, a terry cloth towel introduces micro-scratches that the coating then seals permanently. Every towel that contacts your paint during the prep and leveling stages should be dedicated, clean automotive microfiber.
- Cotton Applicator Pads: Cotton absorbs ceramic coating product rather than depositing it onto the paint surface. The coating saturates the pad rather than transferring evenly onto the panel. This results in insufficient product on the surface, inconsistent coverage, and a flash time that is almost impossible to predict because the amount of product actually reaching the paint varies with every stroke. Use only the suede applicator blocks included in your coating kit, or aftermarket suede applicators designed specifically for ceramic coating application.
- Spray bottle IPA at full concentration: Isopropyl alcohol at 99% or 91% concentration is too aggressive for the final panel wipe before coating. At full concentration, it can temporarily affect certain clear coat formulations and evaporates so quickly that it does not have time to dissolve and lift residues before it flashes off the surface. Dilute to 15-20% with distilled water before use. This is the concentration that cleans effectively without evaporating before it has done its job.
Setting Up Your Tools Before Coating Day
Every experienced detailer who coats cars regularly follows the same preparation habit: every tool is laid out, organized, and ready before the car enters the workspace.
Once the coating is on the first panel, the process does not pause. You will be moving from panel to panel on a tight timeline – applying, monitoring for flash, leveling, and moving on. Stopping to find a towel or refill a spray bottle during that window means the coating on the panel you just applied may flash past the ideal leveling point while you are distracted.
Set up in this order the evening before coating day:
- Fill and label your two wash buckets with grit guards installed
- Pre-mix your IPA dilution and fill the spray bottle
- Set out your ceramic coating kit components: bottle, applicator blocks, suede cloths
- Stack your leveling towels in a clean pile near your application area
- Position your inspection light at a 45-degree angle on a work stand or step ladder
- Set up a designated trash area for used towels and applicator pads
When you begin coating the next day, your only job is to focus on the paint. Everything else is already handled.
Workspace Preparation: The Step Most Beginners Skip
Most DIY ceramic coating guides go straight from “buy the kit” to “apply the coating.” They skip the workspace entirely. This is one of the biggest reasons first-time applications fail before the product ever touches the paint.
The environment where you apply ceramic coating determines the outcome as much as the product itself and the technique you use. A high-quality coating kit applied in the wrong conditions, wrong temperature, wrong humidity, outdoors, or in a dusty garage, produces a result that is worse than a budget kit applied in a clean, controlled environment.
Before you schedule coating day, confirm that your workspace meets every condition in this section. If it does not, address the workspace first. No amount of good technique compensates for bad conditions once the coating is on the paint.
Why Environment Controls Your Result
Ceramic coating is a chemical process. The SiO2 in the formula needs specific temperature and humidity conditions to flash at a predictable rate, bond correctly to the clear coat, and cure evenly across every panel.
When those conditions are outside the acceptable range, three things can go wrong.
First, the coating flashes too fast or too slowly. In high heat, the carrier solvent evaporates in under 60 seconds, faster than most applicators can level a 2 square foot section. The coating hardens unevenly before buffing, creating high spots that require machine polishing to remove. In cold conditions, the flash takes so long that product begins pooling and running before it has started bonding, producing an uneven thickness across the panel.
Second, humidity introduces water contamination. When relative humidity is high, moisture in the air contacts the coating during the flash stage and interferes with the cross-linking process. This produces a chalky, cloudy finish in severe cases, or a reduction in bond strength and coating durability in less obvious ones. Water contamination during cure is the hardest coating defect to identify and one of the most difficult to correct.
Third, airborne contamination embeds permanently. Dust particles, pollen, insects, and garage debris that land on a panel during the flash window cure into the coating surface. Unlike contamination on wax or sealant, particles embedded in cured ceramic coating cannot be washed off. They require a compound or polish to remove, which also removes the coating.
Temperature: The Range That Actually Works
The ideal application temperature for the majority of consumer-grade DIY ceramic coatings is between 60-75 degrees Fahrenheit, which is 15-24 degrees Celsius.
Within this range, the flash window is predictable. You have approximately 2-5 minutes between applying the coating and the point at which you need to begin leveling. That is enough time to apply a 2 square foot section correctly and begin buffing before the product starts hardening unevenly.
Outside that range, the process changes.
- Below 50 degrees Fahrenheit: The coating cures too slowly. The flash takes significantly longer than expected, which means the product sits wet on the surface for an extended period before you can level it. This increases the risk of runs, drips, and an uneven thickness across the panel. Cold temperatures also reduce the final hardness of the cured coating because the cross-linking reaction is temperature-dependent. Coating in cold conditions produces a softer, less durable result even if the application looks correct on the day.
- Between 50 and 60 degrees Fahrenheit: Workable but not ideal. Extend your flash monitoring time and be patient. Do not rush to buff because the surface looks dull, wait for a visible flash signal before touching it.
- Between 75 and 85 degrees Fahrenheit: The flash window shortens. Work in smaller sections, closer to 1.5 square feet rather than 2, and have your leveling towel ready before you start applying each section. At this range the process is still manageable but requires more attention and faster response time.
- Above 85 degrees Fahrenheit: Do not apply ceramic coating. The flash happens too quickly to level correctly on any panel larger than a small section of trim. The risk of high spots and hazing is extremely high. If your garage reaches these temperatures in summer, coat early in the morning before the heat builds, or wait for a cooler day.
Humidity: The Invisible Variable
Humidity is the condition most beginners never think to check. Temperature is obvious, you can feel it. Humidity is invisible, and its effect on a ceramic coating application is not apparent until the coating cures and the damage is already done.
Apply ceramic coating when the relative humidity in your workspace is below 60%.
Above 60%, moisture in the air begins interfering with the evaporation of the carrier solvent during the flash stage. The coating takes longer to flash, the flash signal becomes harder to read, and the final bond to the clear coat is less consistent. Above 70% relative humidity, the risk of a cloudy or streaked finish increases significantly.
Check humidity on the morning of coating day using a basic digital hygrometer, an inexpensive tool available at any hardware store or online for under $15. Do not rely on your phone’s weather app for indoor humidity. Garages trap humidity differently from outdoor conditions, particularly in spring and fall when temperature differences between night and day cause condensation to build on surfaces.
If your garage is running above 60% humidity, run a portable dehumidifier for two to three hours before bringing the car in. This is particularly important in coastal areas, regions with high seasonal rainfall, and basement-level garages.
Check Humidity Before You Start
Humidity above 60% is one of the most common hidden causes of ceramic coating failure. The damage is not visible until the coating cures, by which point correction requires removing the coating entirely. A basic digital hygrometer costs under $15 and removes this variable completely.
Why Applying Outdoors Is Not an Option
This question comes up regularly among beginners who do not have a garage available: can you apply ceramic coating outside in the shade?
The direct answer is no – not reliably, and not safely.
Outdoor application introduces variables that no amount of technique can compensate for. Direct sunlight heats panel surfaces unevenly. Wind carries dust, pollen, and debris across wet coating during the flash stage. Dew point fluctuations in open air affect humidity conditions from one panel to the next. Insects land on freshly applied coating with consistent frequency, particularly in warmer months.
Even in an apparently still, shaded outdoor location, air movement from passing vehicles, wind shifts, and convection off sun-warmed ground surfaces continuously deposits fine particles on panels during the application and flash stages.
A garage is not a preference, it is a requirement for a result that bonds correctly and lasts. If a garage is not available, a large enclosed tent structure or a temporary carport with sealed sides can substitute in calm conditions, but these are compromises with real risks attached. The cleanest possible option is always a closed, swept, dust-settled garage with the door shut during application.
How to Prepare Your Garage Before Coating Day
The evening before you plan to coat, spend 30-40 minutes preparing your workspace. This is not excessive, it is what prevents a $20 problem from becoming a $500 correction job.
A. The evening before coating day:
Sweep the entire garage floor thoroughly to remove loose dust, dirt, and debris. Then wet mop the floor and let it dry completely overnight. This step removes the fine particulate that a broom raises but does not collect. When you drive the car in the next morning, foot traffic and tire movement naturally disturb floor-level dust. A wet-mopped floor reduces the amount of airborne particulate in the workspace during application by a meaningful margin.
Clear the perimeter of the workspace. Cardboard boxes, open storage shelves, loose tools, and fabric items all release particulate into the air. Move anything not needed for the coating process out of the immediate work area the night before.
B. On coating day, before the car enters:
Close the garage door and all windows and vents. Let the space settle for 20-30 minutes before opening the door to bring the car in. This allows any stirred-up dust from your prep to settle back to the floor before the application environment needs to be clean.
Check the temperature and humidity inside the garage before bringing the car in. The temperature inside a closed garage can differ significantly from the outdoor temperature, particularly in morning hours. Confirm the reading is within the acceptable range before starting.
Set up your inspection light on a stand or secure elevated position at the side of the first panel you plan to coat. Angle it at approximately 45 degrees to the paint surface. This is the angle that makes flash visible. Test it by turning off the garage lights, the inspection light alone should illuminate the panel clearly enough to see reflections, surface shimmer, and any particulate that settles during the process.
Organize all tools in the order you will use them. Layout from left to right: wash supplies, decontamination products, clay kit, IPA spray bottle, coating kit, applicator blocks, leveling towels stacked cleanly, trash bag open and positioned nearby.
Bring the car in slowly. Close the garage door behind it. Let the car and the environment settle for 10-15 minutes before beginning the wash. If the car is cold from overnight outdoor storage, the panel temperature may be below the ideal coating range even if the garage air temperature reads correctly. Give panels time to equilibrate to room temperature before beginning the prep process.
Temperature and Humidity Quick Reference
| Condition | Acceptable Range | Risk Outside Range |
|---|---|---|
| Air temperature | 60-75 °F (15-24 °C) | Too cold: slow cure, soft bond. Too hot: flash too fast, high spots |
| Panel surface temperature | Similar to air temperature | Direct sunlight can heat panels 20 to 30 degrees above air temperature |
| Relative humidity | Below 60% | Above 60%: contamination risk. Above 70%: cloudy finish risk |
| Application environment | Enclosed, dust-free indoor space | Outdoors: dust, pollen, insects, UV, uncontrolled humidity |
Phase 1: Surface Preparation (The Most Important Phase)
Every experienced detailer who applies ceramic coatings professionally will tell you the same thing: the coating is the easy part. Surface preparation is where the result is decided.
A ceramic coating bonds chemically to whatever it touches. That is its strength and its unforgiving nature in equal measure. Apply it over a thoroughly decontaminated, polished, and wiped surface and you get a coating that bonds at the molecular level and performs for years. Apply it over a surface that still carries brake dust, clay-bar contamination, polishing oils, or fingerprints and you seal all of that in permanently under a semi-permanent protective layer.
There are no shortcuts in this phase that do not cost you later. Work through each step in the order listed below. Do not skip steps because the paint looks clean to the naked eye. The contamination that matters most in ceramic coating prep is the contamination you cannot see without chemical reaction or physical testing.
Step 1: The Pre-Wash (Removing Surface Contaminants)
The pre-wash removes loose surface contamination, like road grime, dirt, bird dropping residue, dust, and anything sitting on top of the paint that a rinse and shampoo can lift. It is also your first opportunity to assess the paint condition across the full vehicle before the detailed prep work begins.
Use a pH-neutral, wax-stripping shampoo, not your regular car soap:
Standard car shampoos are formulated to clean gently while preserving existing wax and sealant protection. That is exactly the wrong property for a pre-coating wash. You want a shampoo that strips any existing wax, sealant, or quick detailer residue from the surface completely. Look for products labeled as strip wash, coating prep shampoo, or decontamination shampoo. These are formulated with higher surfactant concentrations that actively remove surface protectants rather than preserving them.
Use the two-bucket wash method throughout:
Fill one bucket with your shampoo solution. Fill the second bucket with clean water only. Place a grit guard in the bottom of each bucket. The process is straightforward: wash a panel with the soapy mitt, then before reloading with shampoo, rinse the mitt thoroughly in the clean water bucket. Press the mitt against the grit guard to dislodge trapped particles to the bottom. Then reload with shampoo and move to the next section.
This method prevents the contamination pulled from one panel from being transferred across subsequent panels. On a surface you are about to coat, a single grit particle dragged across the paint creates a scratch that gets sealed in permanently. The two-bucket method eliminates that risk for the cost of an extra bucket and a grit guard.
Wash from the top of the vehicle downward, panel by panel:
Water, shampoo, and contamination flow downward. Starting at the roof and working toward the rocker panels means contamination from upper panels does not run across panels you have already washed. Roof first, then hood, trunk, and upper doors, then lower doors, then rocker panels and bumpers last. The lower sections of any vehicle carry the highest contamination load, like road spray, brake dust, and tar deposits concentrate in this area. Treat them last so their contamination does not travel upward onto cleaner surfaces.
Do not substitute a drive-through or touchless car wash for this step:
This is a point that trips up a significant number of beginners who assume a fresh car wash removes the need for a dedicated pre-wash at home. Drive-through car washes, even touchless ones, use alkaline detergents that leave a chemical residue on the paint surface after rinsing. Touchless washes also use high-concentration drying agents and rinse aids that deposit a light film across the entire vehicle. Neither of these residues is fully removed by a standard home rinse. They interfere with iron remover performance in Step 2 and clay bar effectiveness in Step 3.
Always perform the pre-wash yourself, at home, with your own products, on the day of coating prep.
Rinse thoroughly, then dry completely:
After washing, rinse each panel with a steady flow of water from top to bottom. Do not let shampoo dry on any panel, it leaves a residue that requires re-washing to remove. After rinsing, dry the vehicle completely using a large, clean microfiber drying towel. Work panel by panel in the same top-to-bottom order. Do not allow water to air-dry on the surface, water spots from air drying before the chemical decontamination step create an additional contamination layer that complicates the iron remover and clay bar stages.
Step 2: Iron Decontamination (The Invisible Layer)
After the pre-wash, your car looks clean, but it is not. Embedded in the clear coat surface of almost every vehicle that has been driven more than a few months is a layer of ferrous contamination, microscopic particles of iron and steel from brake dust, rail dust from transport, and industrial fallout from the environment. These particles are invisible to the naked eye on most paint colors. They do not wash off with shampoo. They bond to the clear coat surface at temperatures generated by normal braking and resist standard cleaning chemistry.
If you apply ceramic coating over a surface carrying embedded ferrous contamination, you seal it in. The particles continue to oxidize beneath the coating, producing rust-colored spotting that works its way through the coating layer from underneath, sometimes within 12-18 months of application. Iron decontamination spray removes this layer chemically. It is not optional for coating prep.
How to apply iron remover correctly:
Work on one panel at a time. The vehicle should be cool to the touch and out of direct sunlight before you begin. Apply the iron remover spray generously across the panel surface, covering the entire area evenly. Let the product dwell on the surface for 3-5 minutes without letting it dry. Most iron removers specify a dwell time on the label, follow it for the specific product you are using.
Watch for the chemical reaction:
As the iron remover dwells on the surface, you will see the product change color, typically from clear or pale to a vivid purple or dark violet. This color change is the iron remover reacting with and dissolving the ferrous particles embedded in the clear coat. The more pronounced the color change, the higher the contamination load on that panel. Areas near the wheel arches and lower doors typically show the strongest reaction because brake dust concentration is highest in these zones.
If a panel shows minimal color change, it does not necessarily mean that panel is clean – it may mean the contamination type is non-ferrous, which the iron remover cannot address. Non-ferrous contamination is removed in Step 3 with the clay bar.
Rinse completely before proceeding:
After the dwell time, rinse the panel thoroughly with clean water. Every trace of iron remover must be removed before clay bar treatment begins. Iron remover residue left on the surface can affect clay bar performance and leave a chemical film that the IPA wipe in Step 5 cannot fully remove. Rinse until the rinse water runs completely clear from the panel with no discoloration.
Work through each panel in the same top-to-bottom order used for the pre-wash. Do not allow iron remover to dry on any surface – if you are working slowly in warm conditions, mist the panel with water to prevent it from drying before you complete the dwell time on that section.
Step 3: Clay Bar Decontamination
Iron remover handles ferrous contamination embedded in the clear coat. Clay bar decontamination removes everything else that washing and chemical decontamination leave behind: tree sap residue, road tar deposits, industrial fallout, rubber transfer, paint overspray, and bonded mineral deposits from water spotting.
The clay bar is a pliable, mildly abrasive medium that physically shears bonded contamination from the paint surface when worked across it with lubrication. It does not scratch the paint when used correctly, the lubricant keeps the clay floating across the surface rather than dragging against it. When used without adequate lubrication, clay bar causes fine marring that must be corrected before coating.
How to prepare and use the clay bar:
Tear the clay bar into two or three sections and work with one piece at a time. Flatten the working piece into a disc roughly the size and shape of your palm. This shape gives you even surface contact across the full working face of the clay.
Spray clay lubricant generously across a section of the panel surface, roughly 1-2 square feet at a time. Spray the working face of the clay disc as well. The surface should look wet with lubricant before you begin working the clay across it. Never clay a dry or insufficiently lubricated panel, the friction without lubrication is enough to create fine scratches that will be visible under your inspection light.
Work the clay across the lubricated section using light, straight-line strokes, horizontal passes first, then vertical passes over the same area. Do not use circular or random orbital motions. Circular strokes concentrate friction and can create light swirl patterns in the paint surface that the clay itself introduces. Straight-line strokes are easier to control and distribute the abrasive action more evenly.
How to tell when a section is clean:
Periodically stop and feel the paint surface through the clay with light finger pressure. Contaminated paint feels rough or gritty, like rubbing your fingers across fine-grit sandpaper on a subtle scale. After effective clay bar treatment, the surface should feel genuinely smooth and slick, almost glassy, under your fingertips.
The clay itself will pick up visible contamination as you work, it will darken and you may see embedded particles on the working face. When the working face becomes visibly dirty, fold the clay disc over to expose a clean section and continue. Never use a clay bar section that has been dropped on the floor, dropped clay picks up grit that will scratch the paint surface. Dispose of it and use a fresh piece.
After claying each section, wipe the residual lubricant from the surface with a clean microfiber towel and run your clean hand across the panel. The test is straightforward: if the surface feels completely smooth with no roughness or drag, the section is clean and ready for the next step. If you still feel texture, apply more lubricant and clay the section again before moving on.
Do not rush the clay bar stage. A panel that feels rough after claying still carries bonded contamination. The ceramic coating applied over that contamination will not bond consistently to the clear coat in those areas.
The Plastic Bag Test
A quick way to check clay bar results: place your hand inside a clean plastic bag and run it across the panel surface. The bag amplifies surface texture that fingers alone sometimes miss. A properly clayed panel feels completely smooth with no roughness or drag through the bag. If you feel any texture, clay the section again before moving on.
Step 4: Paint Correction (Optional but Strongly Recommended)
Paint correction is the step that separates a ceramic coating result that looks impressive from a result that looks merely adequate. It is also the step most beginners skip because it requires additional tools, additional time, and an honest assessment of their paint condition.
Here is why it matters and why skipping it is a decision that stays with you for the entire lifespan of the coating.
Ceramic coating locks in the surface it bonds to – permanently:
The coating bonds to the clear coat at a molecular level and hardens over it. Any swirl marks, fine scratches, water etching marks, or light oxidation present on the paint surface at the time of application are sealed beneath the coating. They do not disappear. They do not become less visible. In many cases they become slightly more visible because the coating adds reflectivity to the surface, and reflective surfaces show defects more clearly than dull ones.
Removing those defects after the coating has cured means removing the coating first, which requires machine polishing through the coating layer back to the clear coat. That is the same process as paint correction, plus the additional coating removal step, plus reapplication from scratch. The cost of correcting a bad decision at this stage far exceeds the time and effort of doing it correctly before coating.
For beginners: what paint correction at this stage actually involves:
Full two-stage paint correction, heavy compound followed by finishing polish, is professional-level work that produces a near-perfect surface. You do not need to achieve that standard for a DIY coating application to produce a good result. What you do need is a clean, defect-reduced surface that the coating can bond to and look good over.
A single-stage light polish using a dual-action polisher with a soft foam finishing pad and a finishing polish product removes 60-80% of light swirl marks and fine surface scratches on most paint types. For a daily driver that you are coating yourself for the first time, this level of correction produces a meaningful visual improvement and gives the coating a much cleaner surface to bond to.
If you do not own a DA polisher, a hand application of a finishing polish with a foam hand applicator pad followed by a clean microfiber towel buff removes surface oxidation and reduces the visibility of light swirls without machine assistance. It is less effective than machine correction, but it is substantially better than coating over an unpolished surface.
If you choose not to correct the paint:
Accept that whatever swirl marks, fine scratches, and surface defects are currently on your paint will remain for the lifespan of the coating. On light-colored vehicles, this is often a reasonable trade-off. On dark-colored vehicles, particularly black, the visual impact of uncorrected swirls under a high-gloss ceramic coating is significant. Make an informed decision rather than a default one.
Step 5: IPA Panel Wipe (Surface Degreasing)
The IPA panel wipe is the last step before coating and the most important quality control check in the entire preparation process. Every previous step, like washing, iron decontamination, clay bar and paint correction, deposits something on the paint surface: surfactant residues, lubricant traces, polish oils, and compound residues. The IPA wipe removes all of it and leaves the clear coat surface completely bare, chemically clean, and ready to bond with the ceramic coating.
Do not skip this step even if you believe the surface looks clean after polishing. Polish oils in particular are nearly invisible to the naked eye but create a thin barrier that reduces ceramic coating adhesion if not fully removed. Polishes are specifically formulated to leave a conditioning oil in the paint surface after buffing, that oil needs to be removed before coating.
How to mix and use IPA correctly:
Use isopropyl alcohol diluted to 15-20% concentration with distilled water. Fill a clean spray bottle with this solution before coating day. Do not use tap water for the dilution, tap water contains minerals that leave deposits on the surface after the IPA evaporates. Distilled water leaves no residue.
If mixing your own IPA solution is not something you want to manage, use a dedicated panel prep spray or surface preparation spray product instead. These are pre-formulated to the correct concentration and contain additional cleaning agents specifically designed for this stage of coating prep. They are slightly more expensive than DIY IPA solution but remove the variable of mixing concentration correctly.
Application technique:
Work one panel at a time. Spray the IPA solution across the panel surface, 4-6 sprays for a standard door panel, more for larger panels like the hood or roof. Wipe the surface in straight-line horizontal strokes using a clean, folded microfiber towel. Do not use circular motions, straight lines prevent swirl-pattern residue distribution.
After each pass across the panel, fold the towel to expose a fresh section before the next pass. A towel section that has already passed across the panel carries the oils and residues it picked up on that first pass. Reusing the same towel section redeposits what it just removed. Fold and flip consistently throughout the wipe-down.
How to verify the surface is clean:
After wiping, examine the panel surface under your inspection light. The surface should appear completely uniform, a flat, consistent reflection with no areas of shimmer, slight color variation, or dull patches. Any area that shows a different reflective quality from the surrounding paint still carries a residue layer. Wipe it again with a fresh towel section before moving to the next panel.
The cleaner the IPA wipe result, the stronger and more consistent the ceramic coating bond across that panel. This step takes 15-20 minutes for a full vehicle. It is not the most interesting part of the process. It is arguably the most consequential.
After the IPA wipe – do not touch the surface with bare hands:
The natural oils on human skin are sufficient to contaminate a freshly wiped surface. A single palm press on an IPA-wiped panel leaves an oily handprint that the ceramic coating will bond over and preserve. Keep your nitrile gloves on from this point forward and handle the vehicle only at non-painted surfaces – door jambs, rubber seals, and the underside of trim edges, until the coating application on each panel is complete.
Do Not Touch the Paint After the IPA Wipe
Natural skin oils contaminate an IPA-wiped surface instantly. A single handprint on a freshly wiped panel creates a contamination spot that the ceramic coating bonds over and preserves for the life of the coating. Keep nitrile gloves on from this point forward and handle the vehicle only at non-painted surfaces.
Phase 2: How to Apply Ceramic Coating Step by Step
Your car is washed, decontaminated, corrected, and panel-wiped. Every surface is chemically bare and ready to bond. This is the moment most beginners have been building toward, and the stage where patience and discipline in the previous five steps either pay off or do not.
Knowing how to apply ceramic coating correctly comes down to four things working together: the right amount of product on the applicator, the right section size, the ability to read the flash at exactly the right moment, and a clean leveling technique that removes excess coating without disturbing the bond forming underneath. None of these steps are complicated. All of them require your full attention from the first panel to the last.
Work slowly. Work methodically. Do not rush any section to get to the next one. The ceramic coating application stage takes 2-3 hours for a standard-size vehicle when done correctly. That timeline does not compress without consequences.
Setting Up Your Applicator
Your applicator block is the tool that controls how much product reaches the paint surface and how evenly it distributes. Setting it up correctly before the first panel determines your consistency across the entire vehicle.
Most consumer-grade ceramic coating kits include a foam block and a suede microfiber cloth. The suede cloth wraps around the foam block with the suede side facing outward – this is the surface that contacts the paint. The suede holds the liquid coating product and releases it in a thin, controlled layer as you stroke across the panel. Do not substitute the suede cloth for regular microfiber, foam, or cotton material. The release rate and surface contact properties of suede are specific to ceramic coating application.
To wrap the applicator: lay the suede cloth flat, place the foam block in the center, and fold the edges of the cloth around the back of the block. Hold it firmly in your fingers with the suede face outward. The cloth should be taut against the face of the block with no wrinkles or folds on the working surface.
Applying product to the applicator:
Place 4-6 drops of ceramic coating liquid onto the center of the suede face. This is the correct amount for the first section of each new applicator block. Do not soak the suede, pour the product, or exceed this amount thinking more coverage means faster work. Over-saturating the applicator leads to too much product on the paint surface, which extends flash time unpredictably and increases the risk of high spots.
Before touching the applicator to the car, press the loaded suede face gently against a clean, dry microfiber towel and make one light pass. This spreads the drops across the full working face of the applicator rather than depositing them in a concentrated spot on the first stroke across the paint. A loaded applicator that has not been spread distributes product unevenly on the opening stroke, leaving a heavier deposit in one small area that can flash before the surrounding panel is covered.
Step 6: Work in Small Sections
Section size is the single variable that most directly controls your ability to read and respond to the flash correctly. Every other technique in the application stage depends on working within a section small enough to apply, monitor, and level before the coating begins hardening unevenly.
The maximum section size for a first-time DIY ceramic coating application is approximately 2 square feet, roughly the area of a standard car door from top to bottom edge divided into two equal sections. In warm conditions above 75 degrees Fahrenheit, reduce this to 1.5 square feet. If you are working quickly and confidently after completing several panels, you can extend slightly, but only if the flash timing across previous sections has been consistent and predictable.
Start on a flat, horizontal panel – not curves or edges:
The roof is the best starting point on most vehicles. It is the largest flat horizontal surface on the car, which makes flash monitoring easier because the inspection light reflects uniformly across a flat surface. The hood is the second best starting point. Both surfaces give you a clear view of the flash signal across the full section without the angular complications of vertical panels and curved body lines.
Do not start your first application on bumpers, door edges, mirror caps, or any panel with tight curves or complex geometry. These surfaces require applicator angle adjustments and product pressure management that are significantly easier once you have developed a feel for the flash timing on simpler flat panels. Coating these surfaces first, when your timing is not yet calibrated for the specific conditions of the day, is where most first-time applicators produce their worst results.
Recommended panel order for a standard vehicle:
- Roof (start in the center, work outward toward the edges)
- Hood (center outward, finish with the leading edge last)
- Trunk lid or tailgate
- Driver-side front door, then rear door
- Passenger-side front door, then rear door
- Front quarter panels and fenders
- Rear quarter panels
- Front bumper
- Rear bumper
- Mirror caps, door handles, and remaining trim surfaces last
This order prioritizes the largest flat surfaces first while you are developing timing calibration for the day’s conditions. It also ensures that product from nearby panels does not drift onto surfaces you have already coated during the leveling stage.
Step 7: The Crosshatch Application Pattern
The crosshatch pattern is the application technique that ensures complete, even coverage across every section with no bare strips or product accumulation in any single area. It is not complicated, but it requires conscious attention to follow correctly on every section rather than defaulting to random or circular strokes.
How to apply the crosshatch pattern?
Begin at the top of the section. Apply the coating using slow, overlapping horizontal strokes from left to right across the full width of the section, then right to left on the next pass below, working downward until you have covered the full height of the section. The strokes should overlap by approximately one third to ensure no bare strips between passes.
Without reloading the applicator, immediately repeat the same process with vertical strokes, top to bottom and then bottom to top, over the same area you just covered with horizontal strokes. This second pass in the perpendicular direction covers any gaps between horizontal strokes and ensures the coating is distributed consistently in all directions across the section.
The result is a section that has been covered twice in perpendicular directions with a thin, even product layer. This is what produces uniform flash across the entire section rather than having heavier areas flash before lighter areas are ready.
Pressure and product load:
Use light to moderate pressure throughout. The suede applicator deposits the coating onto the paint, pressure is not what drives product into the surface. The chemical bonding process is initiated by contact and evaporation, not by pressing harder. Excessive pressure during application squeezes product out from the edges of the applicator and produces uneven deposit thickness.
The surface should look slightly wet after the crosshatch pass, a visible liquid sheen across the coated area, but not pooling or running. If you see pooling, you have applied too much product. Use the applicator to lightly spread it across a larger area rather than leaving a saturated spot. If the surface looks dry or the applicator is dragging rather than gliding, the product load is insufficient for the section size.
Reading the applicator as you work:
Pay attention to how the applicator feels as it moves across the paint. A correctly loaded applicator glides with light resistance across the surface, you can feel the product depositing. A dry applicator creates drag and friction. A heavily overloaded applicator feels thick and leaves product building up ahead of the block rather than depositing evenly behind it.
When the applicator begins to drag noticeably on a section, add 2-3 drops, not a full re-prime. The applicator should maintain a consistent glide feel throughout each section. If it feels dry halfway through a section, reduce your section size on the next panel rather than adding more product mid-section.
Step 8: Watching for the Flash (Critical Window)
This is the section of the ceramic coating process that most application guides describe poorly or skip entirely. The flash is the most important moment in the entire application stage, and the one that most beginners either miss, misidentify, or respond to at the wrong time.
Understanding the flash before you begin coating is what separates a first-time application that produces a good result from one that requires correction.
What the flash actually is:
Flash refers to the evaporation of the carrier solvent in the ceramic coating formula. When you apply the coating to the paint surface, the product is a liquid mixture of SiO2 particles suspended in a carrier solvent. As the carrier solvent evaporates from the surface, the SiO2 begins to cross-link with the clear coat and with itself, forming the hardened bond layer that gives the coating its durability and hydrophobic properties.
The flash is not a single moment where the coating is wet and then suddenly dry. It is a window, a period of 1-3 minutes in ideal conditions, that begins when the carrier starts evaporating and ends when the SiO2 has advanced too far in the cross-linking process to be leveled cleanly. Within that window, the coating can be leveled with a microfiber towel. Outside it, before it starts or after it closes, leveling produces the wrong result.
How to visually identify the flash?
Position your inspection light at a 45-degree angle to the coated panel and observe the surface closely. A freshly applied section looks wet and reflective, a consistent liquid sheen across the entire coated area. As the flash progresses, the surface appearance changes in one or more of the following ways:
The surface develops a faint rainbow or iridescent shimmer across the coated area, similar to the shimmer you see on a soap bubble but much more subtle. This is the most commonly described flash indicator and the one most coating products reference in their instructions.
The surface may also show a pattern that experienced detailers describe as a “sweating” appearance, where the surface looks like it is developing a light haze or slight cloudiness across certain areas while other areas remain wet-looking. This indicates that evaporation is progressing unevenly across the section, which is common in conditions where temperature or airflow is not perfectly uniform.
On some coating formulas, the surface transitions from a wet sheen to a more matte or dry appearance without a pronounced rainbow effect. If your product does this, the matte transition is your flash signal. Check your specific product instructions for the flash description recommended by the manufacturer.
Flash time ranges by temperature:
In ideal conditions between 60 and 75 degrees Fahrenheit and below 60% humidity, most consumer-grade ceramic coatings flash in 1-5 minutes after application. This is a workable window that gives you time to apply a full 2 square foot section and begin monitoring for flash before it closes.
In warm conditions between 75 and 85 degrees Fahrenheit, the flash happens in 60-90 seconds. At this temperature range, reduce your section size to 1-1.5 square feet and have your leveling towel folded and ready in your non-application hand before you begin each section. The gap between applying the coating and the flash closing is short enough that any delay reaching for a towel may mean the coating starts hardening before you level it.
In cooler conditions between 50 °F and 60 °F, the flash takes 5-8 minutes or longer. Do not interpret this as an invitation to apply larger sections or to step away from the panel. The longer flash window at lower temperatures also means the cross-linking reaction is slower, which produces a softer initial bond and requires more precise timing at the leveling stage to avoid disturbing the partial bond before it is ready.
The non-negotiable timing rule:
Never begin buffing a section before the flash signal appears. Buffing before the flash wipes the coating off the surface rather than leveling it, the SiO2 has not yet initiated bonding with the clear coat, so the product simply transfers to the towel. The result is a panel that looks coated but has only trace amounts of product remaining on the surface, with none of the chemical bond that makes ceramic coating durable.
Never wait more than 2 minutes after the flash signal appears before beginning to level. Once the cross-linking process advances past a certain point, the coating surface hardens enough that a leveling towel cannot remove excess product cleanly. Instead, it drags partially cured coating across the surface and produces the hazy, streaky pattern known as a high spot, which requires machine polishing to correct.
Apply. Watch. Level within the window. Move to the next section.
Step 9: Leveling and Buffing
Leveling is the controlled removal of excess coating from the surface after the flash. It is not polishing, not buffing for shine, and not a process that requires pressure or speed. It is a precise, light wipe that removes the excess product that sits above the bonding layer without disturbing the bond that is forming beneath.
The two-towel technique:
Use two dedicated, clean, high-GSM microfiber towels for every section you level. Fold each towel into quarters so you have 8 usable surfaces before needing a fresh towel.
First towel: after the flash signal appears, hold the folded towel lightly against the coated section and wipe in slow, overlapping straight-line strokes across the panel. Use light pressure, your hand should rest on the towel without pressing into it. The towel is removing a film of excess product from above the bonding layer. Pressing hard presses the towel into the surface and risks disturbing the partially bonded SiO2 beneath.
After each stroke across the section, flip the towel to a clean surface. Do not re-wipe a section with the same towel surface that made the previous pass. The first pass deposits ceramic coating residue on the towel face. Using that residue-loaded face for a second pass redistributes product onto the surface rather than removing it.
Second towel: immediately after the first towel completes the panel, follow with a second clean towel using the same light, straight-line technique. This final-level pass removes any streaking left by the first towel and produces a consistent, clear reflection across the entire coated section.
What to look for under the inspection light after leveling?
After both towels have passed, examine the section under your inspection light. The surface should show a uniform, clear reflection with consistent depth across the entire coated area. No shimmer variation. No areas of different reflectivity. No streaks or hazy patches.
If you see streaking, add one or two drops of fresh coating to the applicator and lightly re-work the streaked area before attempting another leveling pass. Fresh solvent in the new product reactivates the partially cured surface just enough to allow correct leveling on the second attempt, but only if the section has not been closed for more than 15-20 minutes.
If you see areas that look dull or different from the surrounding coated surface, those areas may have been buffed before the flash closed, leaving insufficient product on the surface. Note these areas with a piece of masking tape at the panel edge and address them during a touch-up pass after completing the full vehicle, but only within the window where fresh product can reactivate the existing application.
Never reuse a leveling towel on a fresh panel:
A towel that has been used to level one panel carries cured or partially cured ceramic coating residue on its fibers. Using that towel on a freshly coated adjacent panel deposits that residue onto the wet application and creates contamination in the bond layer. Keep used leveling towels in a separate pile from clean ones. Label your pile clearly or use a color-coded system. The cost of running out of clean leveling towels mid-vehicle is a correction job – not an inconvenience.
Step 10: Repeat Panel by Panel
The panel-by-panel progression through the vehicle is where the discipline established in the previous steps either holds or breaks down. Most beginners start well and begin taking shortcuts as they develop a rhythm and feel like the process is under control. This is exactly when consistency matters most, because the coating is accumulating across the vehicle simultaneously, and decisions made on panel eight affect whether panels one through seven remain correct.
Move systematically – never double back to a completed panel mid-process.
Work through the vehicle in the panel order established in Step 6. Complete each panel fully, like apply, flash, first leveling towel, second leveling towel and inspection light check, before moving to the next. Do not skip ahead to a panel that seems easier or skip back to re-check an earlier panel while a fresh section is in its flash window on the current one.
Once a panel has been leveled and inspected, leave it. Do not touch it again, do not re-examine it up close, and do not lean against it or rest tools against it. The coating on that panel is in its initial cure stage. Any contact with the surface during this period leaves a mark that becomes permanent as the cure advances.
Reloading the applicator between sections:
After the first section on a fresh applicator block, subsequent sections require only 2-3 drops of product rather than the full 4-6 drops used for the initial prime. The suede fiber retains a residual amount of product after each section. Adding too much product on subsequent sections leads to over-application, more product on the paint than the suede can deposit evenly, resulting in a heavier layer that flashes unpredictably and increases high spot risk.
If you are unsure whether to add product or continue on the current load, do a single stroke across the panel. If the applicator glides with light resistance and leaves a thin visible wet trail on the paint surface, the product load is sufficient. If it drags or the trail is absent, add 2 drops and continue.
When to change the applicator block:
Replace the suede applicator block with a fresh one when:
The suede face has stiffened and no longer glides smoothly even with 4-6 drops of fresh product applied. This indicates the ceramic product in the suede fibers has begun to cure and is no longer releasing correctly onto the paint surface.
The suede face has picked up visible contamination, like dust, debris or paint transfer from a panel edge. A contaminated applicator transfers that contamination across subsequent panels.
The applicator feels structurally compressed or loses its flat face shape. A distorted applicator does not distribute product evenly across the working face.
For a standard sedan or mid-size SUV, plan to use 2 applicator blocks for the full vehicle. This is why the tools checklist specified having 2-3 blocks available before you begin.
Checking previous panels as you progress:
As you move through the vehicle, periodically position your inspection light to check panels completed 20-30 minutes earlier. Look specifically for high spots that were not caught at the immediate post-leveling check, bare patches where product adhesion may have been insufficient, and any contamination that settled onto the surface in the early cure stage.
Catching these within 30-60 minutes of application gives you the option of applying fresh product over the affected area and re-leveling. Beyond 2 hours, the coating has advanced too far into cure for surface correction with additional product. After 24 hours, correction requires machine polishing.
The inspection pass as you work through the vehicle is your final quality control window before the coating becomes permanent. Use it on every vehicle, every time, regardless of how confident the initial panel check made you feel.
How to Apply Ceramic Coating to Glass, Wheels and Trim
Most DIY ceramic coating guides stop at the paint. They walk you through prepping and coating the body panels, then move straight to the cure section without mentioning the windshield, the wheels, or the plastic trim.
A fully coated vehicle, paint, glass, wheels and trim, performs measurably better in daily use, maintains its appearance more consistently between washes, and extends the functional lifespan of every surface it protects. Coating only the painted panels and leaving everything else uncoated means your wheels are still accumulating baked-on brake dust, your windshield is collecting water spots and road film that reduce visibility, and your plastic trim is continuing to fade and oxidize while the painted surfaces next to it stay protected.
This section covers each surface individually, what products to use, how the application differs from paint, and what results to expect.
Applying Ceramic Coating to Your Windshield and Windows
Glass is one of the highest-impact surfaces you can coat on a daily driver. The functional benefit is immediate and noticeable in a way that paint protection is not, you experience it every time it rains, every time you drive at highway speed, and every time you go to clean the windshield.
A ceramic coating applied to glass creates a hydrophobic surface that causes water to bead instantly and sheet off at speed. In moderate to heavy rain above 45 miles per hour, many drivers report not needing wipers at all or using them at the lowest intermittent setting. Road film, bug splatter, and mineral deposits from water spots also release from coated glass far more easily than from bare or chemically treated glass, which means your windshield stays cleaner for longer and cleans faster when you do wash.
A. Choosing the right product for glass:
Not all ceramic coating formulas perform equally on glass. Some consumer-grade paint coatings are compatible with glass application and produce good results. Others are formulated specifically for clear coat bonding and do not adhere as effectively to the silicon dioxide composition of automotive glass.
Check your specific product’s documentation before applying it to glass. Look for language that explicitly states glass compatibility or glass application instructions. If your paint coating is not confirmed glass-compatible, use a dedicated glass ceramic coating product rather than assuming the paint formula will bond and perform correctly on a fundamentally different surface type.
Dedicated glass ceramic coatings are available from most major ceramic coating brands and are typically sold separately from the paint coating kit. They are formulated with a different SiO2 concentration and carrier chemistry that bonds correctly to the smooth, non-porous surface of automotive glass.
B. Glass preparation before coating:
Glass requires its own dedicated prep pass before coating. Automotive glass accumulates a specific set of contamination types that differ from paint: mineral deposits from water spotting, road film and silicone residue from rain repellent products, rubber transfer from windshield wipers, and a light film of interior condensation residue on the interior surface.
Before coating, clean each glass surface with a dedicated automotive glass cleaner, not the same IPA prep spray used on paint. Automotive glass cleaner removes the silicone and mineral residue that general IPA solution does not fully dissolve. After cleaning, do a final wipe with the same IPA dilution used in Step 5, applied with a fresh microfiber towel that has not contacted any painted surface. Glass is the one surface where cross-contamination from a towel that touched polish or compound residue will immediately show as streaking in the cured coating.
C. Application technique on glass:
Apply the ceramic coating to glass using the same crosshatch technique described in Step 7 – horizontal strokes first, then vertical over the same section, but work in slightly smaller sections than you used on paint. Glass is non-porous and does not absorb any product, which means the full applied amount sits on the surface rather than partially penetrating a clear coat layer. The coating layer on glass is thinner by nature.
Flash time on glass is faster than on paint.
This is the most important technical difference between glass and paint application. The non-porous glass surface allows the carrier solvent to evaporate faster than it does over a clear coat layer. In typical conditions, glass flashes 30-60 seconds faster than the flash time you experienced on paint panels during the same session. If your paint panels were flashing in 3 minutes, expect glass to flash in 2-2.5 minutes.
Adjust your section size accordingly. For a full windshield, divide it into 4 sections minimum – top left, top right, bottom left, bottom right – and complete each section through flash and level before moving to the next. Do not attempt to coat a full windshield as a single section regardless of how quickly you work. The bottom sections will be past their flash window before you finish applying the top.
Level glass using a clean, dedicated microfiber towel that has not been used on paint. Glass streaks are harder to correct after cure than paint high spots because the coating bonds directly to a perfectly smooth surface with no surface texture to break up reflective inconsistencies. A clean towel, light pressure, and a thorough two-towel level pass are essential.
D. One rule for glass that has no exceptions:
Do not apply ceramic coating to the interior surface of any glass. Interior glass application creates a hazy, cloudy film that significantly impairs visibility and is extremely difficult to remove once cured. The interior surface of automotive glass is often treated with a defrost element coating, an acoustic dampening film, or a factory UV treatment. Ceramic coating bonds to these treatments rather than the glass itself, producing an uneven, optically distorting layer. Interior glass is not a ceramic coating surface.
Never Apply Ceramic Coating to Interior Glass
Ceramic coating applied to the interior surface of windshields and windows creates a permanent hazy film that impairs visibility and bonds to factory glass treatments. It is extremely difficult to remove after cure. Interior glass is not a compatible surface for any ceramic coating product.
Applying Ceramic Coating to Wheels
Wheels are arguably the most practical surface to ceramic coat on a daily driver. They accumulate the heaviest contamination load of any surface on the vehicle, like brake dust, road grime, tar, and heat-baked deposits that bond aggressively to bare wheel finishes and require significant effort to clean during every wash. A ceramic-coated wheel releases brake dust and contamination with a fraction of the effort and time required to clean a bare wheel.
The difference is immediately noticeable on the first wash after coating. Brake dust that previously required a dedicated wheel cleaner, a brush, and 10 minutes of scrubbing per wheel rinses off coated wheels with a basic hose-down or a light spray of pH-neutral shampoo. Over a year of weekly washing, this compounds into meaningful time saved.
A. Wheel preparation, the most critical step:
Wheels require more thorough preparation before ceramic coating than any other surface on the vehicle. The contamination on a wheel that has been in regular road use is more deeply bonded and chemically diverse than the contamination on paint or glass.
Start with a thorough pre-clean using a dedicated wheel cleaner appropriate for your specific wheel finish – check compatibility for painted, polished, clear-coated, or bare aluminum wheels, as wheel cleaner chemistry varies significantly by finish type. Use a wheel brush set to reach barrel surfaces, lug nut pockets, and spoke edges. Rinse completely.
After the initial clean, apply a wheel-specific iron remover to every wheel surface and let it dwell for the full recommended time. Wheels accumulate ferrous brake dust at a rate that is several times higher than painted body panels. The iron remover reaction on neglected wheels is often dramatic, a heavy purple or near-black color response across the entire surface indicating the density of embedded metallic contamination. Rinse thoroughly after the full dwell.
If the wheel surface still shows embedded tar deposits, road tar remover applied after iron decontamination addresses these before coating. Clay bar treatment on wheels is recommended for polished or high-gloss finishes. For textured or matte wheel finishes, clay bar can slightly alter the surface finish and should be used with care or skipped in favor of chemical decontamination only.
After all decontamination, wipe each wheel surface with IPA solution using a dedicated towel that does not contact the painted body panels. Allow the IPA to fully evaporate before beginning coating.
B. Application technique on wheels:
Apply ceramic coating to wheels in small sections working from the center face outward to the lip, then into the barrel as far as the applicator can reach comfortably. The face and lip of the wheel are the highest-priority coating surfaces because they receive the most visual attention and the heaviest contamination exposure.
Use thin coats on all wheel surfaces. Wheels experience significant thermal cycling during normal driving, surface temperatures on brake-adjacent areas can fluctuate by 200 degrees Fahrenheit or more between a cold start and highway driving. A thick ceramic coating layer on a thermally dynamic surface is more prone to micro-cracking during this cycling than a thin, flexible layer. Apply less product than you used on paint panels and prioritize even coverage over product thickness.
Flash time on wheels varies with the surface type. Polished or clear-coated wheel surfaces flash similarly to paint. Bare aluminum and powder-coated surfaces often flash slightly faster. Monitor the flash signal carefully on the first wheel section and adjust your timing baseline accordingly before moving to the next section.
Allow the coating on all four wheels to reach at least the operational cure stage, 24-48 hours, before driving the vehicle. Brake dust generated during driving is the most aggressive contamination type a fresh ceramic coating encounters. Exposing freshly coated wheels to brake dust before the initial cure is complete risks contamination embedding in the uncured coating surface, which the coating then hardens over. Let the wheels cure before generating new brake dust.
Do Not Drive on Freshly Coated Wheels
Brake dust generated during driving is the most aggressive contamination a fresh ceramic coating encounters. Allow coated wheels to reach at least 24-48 hours of initial cure before driving. Parking for the first night after coating is not enough if you plan to drive the following morning on uncured wheels.
Applying Ceramic Coating to Plastic Trim
Unpainted plastic trim is the surface that most ceramic coating products handle least effectively, and the one where choosing the right product before you apply matters most. Getting this decision wrong means either no bond at all, a patchy uneven result, or a product that cures and then flakes within weeks because it was not formulated to adhere to the surface chemistry of unpainted plastic.
A. Why plastic trim behaves differently from paint:
Unpainted plastic trim, like door surrounds, bumper trim strips, mirror housings and body-color-adjacent black trim, is porous, non-glossy, and chemically distinct from automotive clear coat. SiO2-based ceramic coatings that bond reliably to clear coat surfaces do not always bond effectively to the different molecular surface of unpainted plastic. Some SiO2 formulas absorb into the plastic partially without forming a complete surface bond, which produces a coating that provides minimal protection and wears off unevenly.
Silicon carbide (SiC) based trim coatings and dedicated trim ceramic products are specifically formulated for the surface chemistry of unpainted automotive plastic. They bond more reliably, produce a more consistent result, and last longer on trim surfaces than standard SiO2 paint coatings applied to plastic as an afterthought.
Before applying your paint ceramic coating to any plastic trim surface, check the product documentation explicitly. Look for trim compatibility confirmation. If the product does not mention plastic trim compatibility, use a dedicated trim coating product for these surfaces rather than the paint formula.
B. Trim preparation:
Unpainted plastic trim requires a specific preparation sequence that differs from paint prep. Begin with a dedicated trim cleaner or all-purpose cleaner diluted appropriately for plastic. This removes the oxidation residue, UV protectant buildup, and surface oils that accumulate on plastic trim over time.
For older trim with visible graying or oxidation, a light application of trim restorer prior to ceramic coating can restore the original surface color and provide a better base for the ceramic bond. Apply the restorer, allow it to fully absorb and cure per the product instructions, then proceed with IPA wipe before coating. Do not apply ceramic coating directly over fresh trim restorer without confirming the restorer has fully cured, the oils in many restorer products interfere with ceramic adhesion.
Wipe all plastic trim surfaces with IPA solution before coating, using a fresh dedicated towel that has not contacted paint or glass surfaces. Plastic trim absorbs IPA faster than paint, so work in small sections and re-wipe if the surface appears to re-contaminate before you begin coating.
C. Application technique on plastic trim:
Apply a lighter product load on plastic than on paint. The porous nature of unpainted plastic means the surface absorbs product differently from clear coat. Too much product on a porous plastic surface creates an uneven absorption pattern where some areas take up more coating than others, resulting in a patchy, inconsistent appearance after cure.
Work in small sections, smaller than you used on paint panels. Apply with the same crosshatch technique but with 2-3 drops on the applicator rather than the 4-6 drops used on paint. The flash on plastic trim typically occurs faster than on paint because the porous surface accelerates carrier evaporation. Monitor the flash signal on your first trim section carefully and adjust section size for subsequent areas.
Level with a dedicated towel that has not touched paint or glass. Plastic trim is softer than clear coat and more susceptible to surface marks from contaminated towels. Use the lightest possible pressure during leveling; you are wiping excess product from a surface that offers less resistance than paint, and pressing too hard can create towel marks in the partially cured coating.
D. Trim surfaces to prioritize:
Door surrounds and window trim channels are high-priority surfaces because they are directly adjacent to glass and receive significant water and road spray exposure. Rear bumper trim receives the heaviest contamination load from exhaust deposits and road spray. Front bumper lower trim faces direct impact from road debris and insects.
Mirror housings are worth coating because they remain in continuous airflow during driving, which accelerates contamination bonding on uncoated surfaces. Coated mirror housings stay cleaner and are faster to wipe down.
How Surface Coating Results Compare
| Surface | Flash Time vs Paint | Product Type | Key Result | Cure Before Use |
|---|---|---|---|---|
| Painted panels | Baseline | SiO2 paint coating | UV protection, hydrophobic effect, chemical resistance | 24-48 hours |
| Windshield and glass | 30-60 seconds faster | Glass-compatible coating | Water sheeting at speed, reduced wiper dependence, easier cleaning | 24 hours |
| Wheels | Similar to paint – varies by finish | SiO2 paint coating on coated wheels | Brake dust release, easier cleaning, corrosion resistance | 24-48 hours – cure before driving |
| Unpainted plastic trim | Faster than paint – monitor carefully | SiC trim coating or trim-compatible SiO2 | UV fade resistance, easier cleaning, consistent appearance | 24 hours |
How to Apply Ceramic Coating Spray: Spray vs Liquid
If you search for ceramic coating products online, you will find two distinctly different product categories sitting side by side in the same search results, often using nearly identical marketing language. Both are labeled “ceramic coating”. Both claim hydrophobic protection, UV resistance, and long-lasting gloss. The price difference between them can be substantial, and the application process is completely different.
Understanding how to apply ceramic coating spray specifically, and how it differs from a liquid ceramic coating application, is one of the most useful distinctions a car owner can learn. Confusing the two leads either to buying the wrong product for the job, applying a spray product with expectations that only a liquid coating can meet, or avoiding spray products entirely when they are actually the right tool for the situation.
This section covers both products directly and gives you a complete step-by-step process for spray ceramic coating application.
Spray vs Liquid Ceramic Coating: The Core Difference
The distinction between these two product types comes down to one fundamental property: how the product interacts with the paint surface.
Spray Ceramic vs Liquid Ceramic: The Key Difference
Liquid ceramic coatings bond chemically to the clear coat and last 1-3 years. Spray ceramic coatings sit on top of the surface and last 3-6 months. Both provide real hydrophobic and UV protection, but they are different products built for different purposes and should not be compared as if they are the same thing at different price points.
Liquid ceramic coatings bond chemically to the clear coat at a molecular level. The SiO2 in the formula cross-links with the clear coat surface during the cure process, forming a semi-permanent layer that becomes structurally part of the paint surface. Removing a fully cured liquid ceramic coating requires abrasive polishing through the coating layer. It does not wash off, wipe off, or degrade quickly under normal conditions. This is why liquid ceramic coatings last 1-3 years for consumer-grade products and 3-7 years for professional-grade applications.
Spray ceramic coatings, also sold under names like ceramic spray wax, ceramic boost spray, ceramic detail spray, and ceramic maintenance spray, do not form a chemical bond with the clear coat. They deposit a thin layer of SiO2 particles onto the paint surface through a spray-and-wipe application. The particles sit on top of the existing paint or coating surface rather than bonding into it. This layer provides genuine hydrophobic performance and a meaningful level of UV and chemical resistance, but it degrades through washing, UV exposure, and environmental contact at a rate that reflects its surface-level nature. Most spray ceramic coatings last between 3 and 6 months under regular washing conditions.
Neither product is superior in all situations. They serve genuinely different purposes and suit different types of car owners and different stages of a paint protection routine.
A. Spray ceramics are the right choice when:
- You want protection for a vehicle that does not justify the preparation time and cost of a full liquid ceramic coating application
- You are maintaining an existing liquid ceramic coating and want to refresh the hydrophobic layer between full reapplications
- You need a quick, weekend-friendly protection option with no special workspace requirements
- You want to apply protection immediately without a full decontamination prep cycle
- You are new to ceramic products and want to understand how they behave before committing to a liquid application
B. Spray ceramics are not the right choice when:
- You want protection that lasts longer than 6 months from a single application
- You need the chemical resistance and UV blocking performance that only a properly bonded liquid coating provides
- You are trying to save money by using a spray product instead of a liquid coating on a vehicle you plan to keep for several years, the per-year cost of repeated spray applications adds up to more than a single liquid coating application in most cases
Common Spray Ceramic Products and What They Actually Are
The spray ceramic category contains products with significantly different SiO2 concentrations, carrier chemistries, and performance levels. A few clarifications about what you will encounter when shopping:
Ceramic spray waxes are hybrid products that combine traditional wax or polymer sealant chemistry with a small percentage of SiO2. They provide modest hydrophobic performance and last slightly longer than traditional wax, typically 2-4 months. They are the entry-level end of the spray ceramic category.
Dedicated spray ceramic coatings contain higher SiO2 concentrations and are formulated specifically to maximize the hydrophobic and chemical resistance properties that SiO2 provides at a surface level. These are the products that deliver 3-6 months of meaningful performance and represent the better end of the spray ceramic category.
Ceramic booster or topper sprays are designed specifically to be applied over an existing liquid ceramic coating as a maintenance product. They partially replenish the hydrophobic layer of a liquid coating as it gradually wears from the top surface down. Applied every 3-6 months over a liquid coating, they extend the coating’s active lifespan and maintain the water-beading performance at close to its original level. These are not standalone protection products, they are maintenance tools for a vehicle that already has a liquid coating applied.
If you are currently working through this guide because you have just applied a liquid ceramic coating, a ceramic booster spray is the product you will use for ongoing maintenance. If you are applying spray ceramic coating as a standalone protection layer on a vehicle without an underlying liquid coating, use a dedicated spray ceramic product rather than a booster.
Step-by-Step: How to Apply Ceramic Coating Spray
Spray ceramic coating application is fundamentally more forgiving than liquid ceramic coating application. There is no flash window to monitor, no IPA wipe-down required, no temperature-critical environment to maintain, and no leveling towel timing to manage. The process is closer to a spray wax application than to the precise, structured process of liquid ceramic coating.
That said, surface cleanliness still matters. A spray ceramic coating deposited onto a dirty or contaminated surface bonds to the contamination rather than the paint, which reduces its hydrophobic performance and shortens its lifespan significantly.
Before You Begin: Surface Cleanliness Requirements:
Spray ceramic coating does not require the full five-step decontamination prep used for liquid coating. You do not need iron remover, clay bar, paint correction, or an IPA panel wipe. What you do need is a clean, dry vehicle with no surface contamination that would prevent the spray product from contacting the paint directly.
A thorough hand wash with a pH-neutral shampoo using the two-bucket method is the correct prep for a spray ceramic application. Remove bird dropping residue, tree sap, and any visible surface contamination before beginning. Rinse completely and dry the vehicle fully before starting, spray ceramic coatings applied to wet or damp surfaces streak and do not distribute evenly.
1. Choose the Right Conditions
Spray ceramic application is more tolerant of environmental conditions than liquid coating, but a few basic conditions still produce better results.
Apply on a cool panel out of direct sunlight. Warm panels in direct sun cause the spray product to flash too quickly before you can spread it evenly, which leaves uneven residue distribution and requires more buffing effort to correct. If you are working outdoors, apply in the early morning or late afternoon when panel temperatures are lower and direct sun intensity is reduced.
Avoid applying in high wind conditions outdoors. Spray ceramic products in mist form are carried by wind onto surrounding surfaces – neighboring vehicles, windows, and painted walls. Work in a garage or sheltered area whenever possible.
Temperature range for spray ceramic application is broader than for liquid coatings. Most spray products work correctly between 50 and 90 degrees Fahrenheit. Below 50 degrees, the product spreads poorly and leaves uneven coverage. Above 90 degrees, it flashes before you can work it across a full panel.
2. Prepare Your Applicator and Towels
Set out the following before beginning:
- Your spray ceramic coating product
- 2-3 clean foam applicator pads or folded microfiber applicator cloths
- 4-6 dedicated microfiber buffing towels, more than you think you need
- A clean microfiber drying towel if any surface areas need additional drying
Spray ceramic products leave more visible residue during application than liquid coatings. You will go through buffing towels faster than expected if the vehicle is large or if you are working in conditions that cause the product to set quickly. Having extra clean towels ready before you begin prevents the common situation of running out of clean towel surfaces midway through the vehicle.
3. Apply to One Panel at a Time
Work through the vehicle one panel at a time using the same systematic order described previously: roof first, then hood, trunk, and doors before moving to lower panels and bumpers.
For each panel, spray 2-3 pumps of the ceramic spray product directly onto a clean foam or microfiber applicator pad, not directly onto the paint surface. Applying directly to the paint surface concentrates product unevenly and creates areas of heavy application that require significantly more buffing effort to level.
Spread the product across the panel using overlapping strokes; horizontal first, then vertical over the same area for consistent coverage. Use light to moderate pressure. The product should spread visibly across the panel with a light wet sheen as you work. If the applicator feels dry before you cover the full panel, add 1-2 more pumps to the pad and continue. Do not re-spray directly onto the already-applied area on the panel. Add product to the applicator, not to the paint.
4. Wait 30-60 Seconds, Then Buff
After applying the product to a panel, allow it to sit on the surface for 30-60 seconds before buffing. This brief dwell time allows the SiO2 particles to settle onto the paint surface and begin their surface-level interaction with the clear coat.
Do not wait longer than 60-90 seconds in warm conditions or on panels in partial sun. Spray ceramic products that are allowed to set for too long before buffing become progressively more difficult to remove cleanly and leave a visible haze that requires a second buffing pass to eliminate.
Use a clean, dry microfiber buffing towel to remove the product from the panel using overlapping circular or straight-line strokes. The product wipes away more easily than liquid ceramic coating residue; it has not formed a chemical bond with the clear coat, so it releases from the surface cleanly with minimal pressure.
5. Flip the Towel Frequently
Spray ceramic products leave considerably more residue on buffing towels than liquid ceramic coatings. After 2-3 passes across a standard door panel, the towel surface will have accumulated enough product residue that continuing to buff with the same face redistributes product onto the paint rather than removing it.
Fold the towel to a fresh section after every 2-3 wipe passes. For a full-size vehicle, plan to work through 4-6 clean towel faces across the complete application. Running out of clean towel faces mid-vehicle is the most common cause of streaking in spray ceramic applications. The product is forgiving, the towel management is not.
After buffing each panel, check the surface in available light for any areas of streaking or uneven coverage. A streaked area means product was not fully removed on the first buffing pass. A light second pass with a clean, dry microfiber towel on that specific area corrects it before moving on.
6. No Cure Window Required
One of the most practical advantages of spray ceramic coating over liquid ceramic coating is the absence of a cure window requirement. After buffing, the applied surface is effectively ready for normal use.
You do not need to keep the vehicle dry for 24-48 hours. You do not need to avoid car washes for a week. The surface can encounter rain, humidity, and normal contamination immediately after the application is complete.
This makes spray ceramic coating genuinely practical as a maintenance product, something you can apply on a Saturday morning and drive on that same afternoon without any restrictions on the vehicle’s use.
For maximum durability from the application, avoid washing the vehicle for 24 hours after applying. While the product does not require a cure window in the same sense as a liquid coating, the surface-level SiO2 layer benefits from settling undisturbed for a full day before its first wash exposure.
7. Final Inspection and Touch-Up
After completing the full vehicle, do a final walkthrough in good light, natural daylight is better than garage lighting for this check. Look for:
- Any panels that show a different level of gloss or sheen than adjacent panels, this indicates uneven coverage
- Streaks or haze lines that were not caught during the panel-by-panel buffing pass
- Panels that were missed entirely during the application sequence
Any area showing streaking or uneven coverage can be corrected immediately with a light application of additional product and a fresh buffing towel. Spray ceramic products remain workable for several hours after application, unlike liquid ceramic coatings where the correction window closes within minutes.
Spray vs Liquid Ceramic Coating: Side-by-Side Comparison
| Factor | Liquid Ceramic Coating | Spray Ceramic Coating |
|---|---|---|
| Bond type | Chemical bond to clear coat – semi-permanent | Surface-level deposit – sits on top of paint |
| Durability | 1-3 years (consumer) / 3-7 years (professional) | 3-6 months |
| Prep required | Full decontamination – iron remover, clay bar, IPA wipe | Wash and dry only |
| Application difficulty | Moderate to high – flash window, timing critical | Low – forgiving, no timing pressure |
| Workspace requirements | Enclosed, temperature and humidity controlled | Flexible – outdoors acceptable in calm conditions |
| Cure window | 24-48 hours minimum – car must stay dry | None – ready for use after buffing |
| Cost | $30-150 for DIY kit | $15-50 per bottle |
| Best for | Long-term paint protection, daily drivers, newer vehicles | Maintenance over existing coating, quick protection, casual use |
| Correction if applied wrong | Machine polishing required | Wipe off and reapply immediately |
Which Product is Right for Your Situation?
If you have already completed a liquid ceramic coating application on your vehicle following this guide, a spray ceramic coating is your maintenance tool, not a replacement for the coating you just applied. Use it every 3-6 months to refresh the hydrophobic layer and extend the performance lifespan of the liquid coating beneath it.
If you have not applied a liquid coating and want paint protection without the preparation time and workspace requirements that liquid application demands, a dedicated spray ceramic coating is a legitimate standalone choice. You will reapply it every 3-6 months rather than every 1-3 years, but the per-application effort is minimal and the protection level is meaningful for regular daily drivers.
If you are weighing whether to apply a liquid coating or a spray ceramic on your specific vehicle, the decision framework discussed previously in Spray vs Liquid Ceramic Coating applies directly. A newer, higher-value vehicle that you plan to keep for three or more years justifies the preparation investment of liquid ceramic coating. An older vehicle, a lease return, or a car you are selling within 12-18 months is a better candidate for spray ceramic protection.
The Cure Window: What Happens After Ceramic Coating Application
You have completed the application. Every panel is coated, leveled, and inspected. The vehicle looks better than it has in years, deep gloss, consistent reflection, and that wet-look clarity that a properly applied ceramic coating produces on clean paint.
This is the moment most DIY guides consider the job done, but it is not.
What happens in the 2-4 weeks after application determines whether the coating you just spent 6-10 hours applying performs at its rated durability and protection level, or fails prematurely. The cure window is the phase where the SiO2 cross-linking process completes its bond to the clear coat, the coating achieves its full hardness rating, and the hydrophobic properties reach their maximum performance level.
It is also the phase where a single avoidable mistake, rain contact in the first 24 hours, a car wash visit on day three, a bird dropping left on the surface for a day in the first week, can permanently damage the coating that just took you a full day to apply.
Understanding what is actually happening inside the coating during each cure stage, and exactly what to avoid at each point, is the difference between a coating that delivers 2-3 years of protection and one that degrades in under 12 months.
What Is Actually Happening During Cure
When you apply ceramic coating and level it with a microfiber towel, the surface layer of SiO2 has initiated bonding with the clear coat, but the process is far from complete. The coating exists in multiple layers of cross-linking density at this point. The top surface has the most solvent evaporated and the most advanced cross-linking. The deeper layers, closer to the clear coat interface, are still in earlier stages of the bonding process.
Cure is the progressive completion of this cross-linking from the surface downward through all layers of the applied coating, and simultaneously from the clear coat interface upward. When both processes meet in the middle, when the cross-linking is complete through the full depth of the coating layer, the coating has reached full cure.
At full cure, the SiO2 network has formed its maximum density of molecular bonds both internally and with the clear coat beneath it. This is when hardness reaches the rated 9H level, hydrophobic performance reaches its peak water-sheeting angle, and chemical resistance is at its strongest.
Before full cure, every stage represents a progressively stronger bond, but not yet the complete network that makes ceramic coating durable. This is why behavior and exposure during the cure window matters as much as it does.
Cure Stage Breakdown
| Cure Stage | Timeframe | What Is Happening in the Coating | What to Do and Avoid |
|---|---|---|---|
| Surface cure (flash cure) | 0-2 hours | Top layer has bonded and surface is touchable. Cross-linking has initiated through the upper coating layers. | Avoid all water contact, dust settling, and any surface touch. Keep the vehicle completely still in the workspace. |
| Initial cure | 2-24 hours | SiO2 cross-linking progressing through middle and lower coating layers toward the clear coat interface. Coating is fragile to water contamination. | Keep car indoors in a dry, dust-free environment. No washing. No rain exposure. No touching the surface. |
| Operational cure | 24-48 hours | Cross-linking sufficiently advanced for light rain and normal driving without surface damage. Hydrophobic effect becomes visible. | Avoid car washes, brush or touchless. Avoid pressure washing. Avoid chemical contact. Light rain is now manageable. |
| Advanced cure | 7-14 days | Cross-linking continuing through deep layers. Hardness increasing progressively. Coating more resistant but not yet at full performance. | Avoid automatic car washes, alkaline cleaners, clay bar. Hand wash with pH-neutral shampoo only if washing is necessary. |
| Full cure | 2-4 weeks | Maximum hardness and hydrophobic performance achieved. SiO2 network fully cross-linked through all layers to the clear coat interface. | Normal maintenance routine can begin. First ceramic booster spray application recommended at the 3-month mark. |
The Cure Window in Real-World Terms
Understanding the cure stages academically is straightforward. Applying that understanding to real-world ownership decisions during the first four weeks is where most car owners struggle, because life does not pause for a curing ceramic coating.
Here is what the cure window actually means for common daily driving situations:
- Can you drive the car after coating? After the 24-48 hour initial cure stage, the coating is hardened enough for normal driving. Light rain during driving at this stage is acceptable. The coating is not yet at full hardness, but the surface is no longer at risk from incidental water contact during normal vehicle use.
- Can you park outside after coating? For the first 24 hours, keep the vehicle indoors in the environment where it was coated. After 24 hours, outdoor parking is acceptable in dry conditions. Avoid parking under trees during the first two weeks, tree sap and bird droppings have a more damaging effect on a curing coating than on a fully cured one.
- What if it rains during the first week? Light rain after the 48-hour operational cure mark is not catastrophic. The coating will not fail from brief rain exposure at this stage. Heavy rain with road splash and contaminant exposure is more concerning. If the car gets caught in rain during the first week, rinse it gently with clean water when possible, do not rub or wipe the wet surface, and do not allow contaminated road spray to dry on the surface without rinsing.
- When can you wash the car properly? Hand washing with a pH-neutral shampoo is acceptable after 7 days. Use very light wash mitt pressure and rinse thoroughly. Avoid automatic car washes for a minimum of 30 days. The chemical detergents in touchless car wash systems are alkaline, they interfere directly with the cross-linking chemistry during the cure period. Even a touchless car wash within the first 30 days shortens the coating’s final durability relative to what it would have achieved with a clean cure window.
What Ruins Ceramic Coating During the Cure Window
The following are not theoretical risks. Each one is a documented, recurring cause of ceramic coating failure that professional detailers encounter regularly when recoating vehicles where the original application had a compromised cure window. Understanding what each does to the curing coating, not just that it is harmful, helps you take the risk seriously and make the right decisions during the cure period.
1. Rain or Water Contact Within 24 Hours:
Water is the most common cause of ceramic coating failure in the cure window, and the most avoidable one with basic planning.
In the first 24 hours after application, the cross-linking process is actively progressing through the coating layers. The carrier solvent that remains in the lower layers has not fully evaporated. When water contacts the coating surface during this window, it does two things simultaneously.
First, it introduces hydrogen bonding that competes with the SiO2-to-clear-coat cross-linking process. The cross-linking reaction requires the SiO2 to bond with the clear coat’s molecular surface. Water molecules compete for the same bonding sites, interrupting the formation of complete molecular bonds in the areas where water contact occurs. The result is a coating with incomplete bonding in water-contacted areas; weaker, less chemically resistant, and shorter-lived than surrounding areas where the cure proceeded normally.
Second, water that dries on the surface during the first 24 hours leaves mineral deposits that cure permanently into the coating layer. These appear as water spots that cannot be removed by washing because they have bonded into the coating itself during cure. Removing them requires polishing through the coating, which defeats the purpose of applying it.
If water contact occurs in the first 24 hours, do not wipe the surface. Wiping a wet, curing ceramic coating creates drag marks and streak patterns that cure in permanently. If the car is caught in light rain during the first 24 hours, move it indoors immediately and allow the water to evaporate naturally from the surface rather than wiping it off.
2. Bird Droppings and Tree Sap:
Bird droppings are one of the most acidic contamination types that contact automotive paint in normal use, with a pH that can reach as low as 3.5-4.5 depending on the bird’s diet. On a fully cured ceramic coating, the protective barrier slows the etching process significantly compared to bare paint. On an uncured coating, the acid contacts a surface that has not yet formed its full chemical resistance, and etches into the partially cured SiO2 network within hours, particularly in warm conditions.
Tree sap carries a combination of organic acids and resinous compounds that bond aggressively to any surface they contact. On a curing coating, tree sap can cure in alongside the SiO2 cross-linking process, essentially becoming embedded in the coating layer. Once this occurs, removing the sap requires removing the coating in that area.
During the first two weeks of cure, bird droppings and tree sap should be treated as urgent, remove them within 2 hours of contact if at all possible. Use a detailing spray safe for fresh ceramic coatings applied to a folded microfiber towel, blotting the contamination rather than wiping across it. Do not leave either contamination type on the surface overnight during the first two weeks under any circumstances.
3. Car Washes (Brush or Touchless) Within 7 Days:
Both brush-based and touchless automatic car washes are harmful to a curing ceramic coating, but for different reasons.
Brush-based car washes contact the curing surface with rotating cloth strips or foam brushes that generate friction. During the cure window, the coating has not yet reached its rated hardness. The friction from brush contact on a coating at 40-60% of its final hardness creates micro-abrasion damage, fine scratches in the surface of the coating that are sealed in as the cure completes. These appear as a network of fine swirls that become visible under direct light after the coating reaches full hardness.
Touchless car washes use high-alkalinity chemical detergents that remain on the surface during the wash cycle before rinsing. Alkaline chemistry actively interferes with SiO2 cross-linking. The detergent molecules compete with the bonding process in areas of direct contact, producing a patchier, less consistent bond throughout the coating after cure. You will not see this damage immediately, it manifests as uneven hydrophobic performance 3-6 months after application, where some areas bead water correctly and others show reduced performance.
Avoid all automatic car washes for a minimum of 7 days. If washing is necessary during the first week, hand wash using a pH-neutral shampoo with very light mitt pressure and avoid leaving shampoo on the surface for more than 30 seconds before rinsing.
4. High-Pressure Water in Wheel Wells and Panel Gaps Within 48 Hours:
A pressure washer directed at wheel wells, panel gaps, door jambs, and lower rocker panels within the first 48 hours of coating can physically dislodge coating from these areas before it has fully bonded.
The ceramic coating in recessed areas, wheel arches, lower body panel edges, and jamb surfaces, receives less environmental stabilization than flat painted surfaces during the application and initial cure stages. The coating in these areas is also typically applied in thinner, less controlled layers than on flat panels. High-pressure water impact on these surfaces during the first 48 hours can strip the coating from panel edges and recessed areas that did not have time to form a complete bond before pressure exposure.
If the vehicle requires cleaning in the first 48 hours, road contamination from driving or light rain, use a gentle low-pressure rinse from a standard garden hose rather than a pressure washer. Direct the flow gently across surfaces rather than directing it at gaps and recessed areas.
5. Leaving the Car in Direct Sunlight During the First 24 Hours:
Ceramic coating cure is a temperature-dependent chemical process. Within a controlled temperature range, the cross-linking progresses at a predictable, even rate across all surfaces of the vehicle. Direct sunlight exposure during the first 24 hours after application introduces uneven thermal conditions that produce uneven cure rates across different panels.
A panel in direct sun heats to a surface temperature 20-40 degrees Fahrenheit above the air temperature. The cure rate on that panel advances faster than on panels in shade. The result is a coating that reaches different stages of cross-linking simultaneously across the vehicle, some panels at operational cure while others are still in initial cure, which produces inconsistent hardness and hydrophobic performance levels across the finished coating.
This is less of a risk after 24 hours, when the cross-linking is advanced enough that differential cure rates between sun-exposed and shaded panels have a minimal effect on the final outcome. For the first 24 hours, keep the vehicle out of direct sun in your workspace. After the 24-hour initial cure is complete, normal outdoor parking in sun is acceptable.
The First 30 Days: A Practical Care Guide
Ceramic Coating After-Care: First 30 Days
Hours 0-24: Keep indoors. No water contact. No touching the surface. No sunlight exposure. Do not drive.
Hours 24-48: Can drive carefully. Light rain acceptable. No car washes. No pressure washing. Remove bird droppings immediately by blotting only.
Days 3-7: Outdoor parking acceptable. Avoid parking under trees. No car washes. Gentle rinse only if contamination requires it.
Days 7-30: Hand wash with pH-neutral shampoo acceptable after day 7. Still no automatic car washes. No alkaline cleaners. No clay bar. No wax or sealant products applied over the coating.
After 30 days: Full cure complete. Begin normal pH-neutral maintenance wash routine. First ceramic booster spray application recommended at the 3-month mark.
Why the Full Cure Timeline Is Longer Than Most People Expect
The 2-4-week full cure timeline surprises many first-time ceramic coating applicators. The surface looks and feels hard within 24-48 hours. Water beads on it immediately after the initial cure. The gloss is visible and consistent. It is natural to assume the job is effectively done.
The surface appearance after 48 hours reflects the cure state of the top coating layer only, the layer closest to the air. This is the layer that experienced the fastest solvent evaporation and therefore the fastest cross-linking initiation. The full cure timeline of 2-4 weeks reflects the time required for cross-linking to complete through all layers down to the clear coat interface.
A coating at 48 hours of cure is at perhaps 40-60% of its final hardness rating. A coating at 7 days is at 70-80%. Full 9H hardness, maximum chemical resistance, and peak hydrophobic performance are reached at the 2-4 week mark depending on environmental temperature, humidity, and the specific coating formula.
Treating the vehicle as fully cured at 48 hours rather than 2-4 weeks shortens the eventual coating lifespan because the cross-linking completes under conditions that were not optimal, chemical exposure from car wash detergents, physical exposure from pressure washing, or contamination exposure from unchecked bird droppings interfere with the completion of a process that needed undisturbed conditions to reach its maximum bond density.
Give the coating the cure time it needs. The 2-4 week inconvenience of modified care habits produces a coating that performs correctly for its full rated lifespan. Cutting that window short produces a coating that performs adequately but falls short of what the product was capable of delivering.
7 Common Ceramic Coating Mistakes Beginners Make (And How to Fix Them)
Every experienced detailer who has applied ceramic coatings professionally has made most of these mistakes at some point, usually early in their practice, on someone else’s car, in conditions they should have controlled better. The difference between a first-time applicator who produces a good result and one who needs to polish out a failed application is almost always one of these seven errors.
None of them are complicated. None of them require special skill to avoid once you understand exactly what causes them and what the consequence looks like. Reading through this section before you begin your first application is one of the most useful preparation steps in this entire guide, because recognizing a mistake in the moment it is happening gives you the chance to correct it before it becomes permanent.
Mistake 1: Skipping the IPA Panel Wipe
What causes it: The paint looks clean and shiny after polishing. Running a towel soaked in isopropyl alcohol across a surface that already appears perfect feels unnecessary, like an extra step that adds time without adding obvious value.
What actually happens: Machine polishing leaves a residual layer of polish oils in the paint surface. These oils are the conditioning agents in polish formulas that give the paint its smoothed, filled appearance after correction. They are nearly invisible on the paint surface and cannot be detected by touching the paint with a bare hand. But they are present in sufficient quantity to create a thin barrier between the ceramic coating and the clear coat surface at the molecular level.
A ceramic coating applied over residual polish oil does not bond directly to the clear coat. It bonds to the oil layer instead, and oil layers are not stable, long-term bonding surfaces. The coating applied over contaminated paint can show dramatically reduced durability, patchy hydrophobic performance in the areas where oil concentration was highest, and in some cases early delamination where the coating separates from the surface in areas of poor bond contact.
The fix: Complete the IPA panel wipe on every panel, every time, regardless of how clean the paint looks after polishing. The wipe takes 15 to 20 minutes for a full vehicle. It is the step that confirms the surface is ready for the coating to bond correctly. If you skip it because the paint looks clean, you are making a judgment based on visual appearance about a condition that requires chemical testing, not sight, to verify. The IPA wipe is that chemical test.
Mistake 2: Working in a Too Large Section
What causes it: The coating is going on smoothly, the process feels manageable, and working a larger section seems more efficient. A 2 square foot limit sounds conservative. Beginners commonly extend their sections to a half-panel or a full door and run into problems before they realize what is happening.
What actually happens: The flash does not wait. If you apply coating across a section larger than you can monitor and level within the flash window, the first area you coated begins entering the flash window before you finish applying the last area of the section. By the time you return to level the first area, it has either just passed the optimal buffing point or, in warm conditions, has already hardened into an uneven surface that a leveling towel can no longer correct cleanly.
The result is a section with areas at different stages of cure simultaneously. The areas that received the first strokes are partially hardened. The areas that received the last strokes are just entering flash. Buffing across this section produces inconsistent results – some areas level cleanly, others drag and streak because the coating has advanced past the leveling window.
The fix: Keep sections to a maximum of 2 square feet in ideal conditions. In warm conditions above 75 degrees Fahrenheit, reduce to 1.5 square feet. On your first panel, apply a deliberate test section of 1 square foot to calibrate the flash timing for the specific temperature and humidity conditions of the day before committing to larger sections. Let the conditions tell you what section size is workable, do not assume the maximum size is always appropriate.
Mistake 3: Buffing Before the Flash
What causes it: The coating has been on the surface for a minute or two and nothing visible seems to be changing. The section looks wet and flat. There is no obvious shimmer signal. The beginner decides the flash must have happened already, or that waiting longer will cause the coating to harden, and begins buffing.
What actually happens: Buffing before the flash wipes the ceramic coating off the paint rather than leveling it. The SiO2 has not yet initiated sufficient cross-linking with the clear coat to create resistance to a towel pass. The leveling towel simply picks up the liquid coating from the surface and carries it away, leaving only a trace amount of product on the paint, not enough to form a durable coating bond.
The panel appears to look normal after this premature buffing. The surface is not visibly different from a correctly leveled panel. This makes pre-flash buffing one of the most insidious mistakes in the application process, the damage is invisible at the time it occurs. It only becomes apparent weeks or months later when that panel shows dramatically reduced hydrophobic performance or loses its coating entirely while adjacent panels remain intact.
The fix: Never begin buffing until the flash signal is clearly visible. The flash appears as a faint rainbow shimmer, a slight iridescent quality, or a subtle change from the wet-flat look to a slightly more matte or hazed surface, observable under your inspection light at a 45-degree angle to the panel. If you cannot clearly see the flash signal, do not buff. Wait. Add 30 seconds. Look again. The flash will come. Buffing too early because you are uncertain whether the flash has occurred is the single most common reason for coating failure on individual panels.
Pre-Flash Buffing Is Invisible Damage
Buffing before the flash wipes the coating off the paint. The panel looks normal afterward, the damage is not visible until weeks or months later when that panel shows reduced hydrophobic performance or loses its coating entirely. If you are not certain the flash has occurred, wait. The flash will come. The risk of waiting an extra 30 seconds is zero. The risk of buffing 30 seconds too early is permanent coating failure on that panel.
Mistake 4: Using Too Many Drops of Product
What causes it: More product seems like better coverage. If 4-6 drops creates a good result, 10-12 drops must produce a thicker, more durable coating. This logic feels correct but is the opposite of how ceramic coating chemistry works.
What actually happens: Ceramic coating does not work like paint or wax where a thicker layer provides proportionally more protection. The active bonding happens at the molecular interface between the SiO2 and the clear coat surface. The coating thickness above this interface layer does not increase protection – it just increases the amount of product that sits above the bond, creating a layer that has nowhere to go during the flash and leveling stage.
Too much product produces a flash that is difficult to read because different areas of the over-applied section evaporate at different rates. The thicker areas in the center of the application take longer to flash than the thinner edges, creating a section where no single moment represents the correct buffing point for the entire area simultaneously. The result is high spots in the thicker areas where excess product hardens before it can be leveled, and correctly leveled areas around them where the flash timed correctly.
Over-application also makes the leveling stage physically harder. A thick coating layer creates drag resistance when the leveling towel passes across it, you can feel the towel working against the product rather than gliding across it. This drag increases the pressure required to wipe the surface, which increases the risk of disturbing the bonding layer beneath the excess product.
The fix: Use 4 to 6 drops of product on the initial applicator prime. Use 2-3 drops on subsequent sections with the same applicator. If the applicator glides with light resistance and leaves a thin visible wet trail on the paint, the product load is correct. If the applicator feels thick or draggy immediately after applying, the load is too heavy. Spread it to a slightly larger area rather than removing it, distributing an over-loaded section across a larger surface area reduces the thickness to an appropriate level more effectively than trying to remove excess with the applicator.
Mistake 5: Reusing Leveling Towels Between Panels
What causes it: A leveling towel looks clean after one or two panel passes. Reaching for a fresh towel after each section feels excessive, especially when the towel in hand appears to have plenty of clean surface remaining.
What actually happens: A leveling towel that has made contact with a coated panel carries ceramic coating residue in its fibers from that contact, even if the towel surface looks clean to the eye. The residue is transparent and does not visibly contaminate the towel appearance. When that towel contacts a freshly applied section on an adjacent panel, the residue in the fibers transfers back to the fresh application.
This transferred residue disrupts the flash process on the fresh panel because it adds a layer of partially cured material to a surface that has not yet reached its own flash point. The result appears as streaks, haze lines, or uneven reflective quality in the leveled coating, defects that are often attributed to incorrect technique when the actual cause is towel cross-contamination.
On dark-colored vehicles, reused leveling towel streaking is visible from several feet away in direct light. On light colors, it is more subtle but still present as an inconsistency in the coating’s reflective quality.
The fix: After each wipe pass across a coated section, fold the towel to expose a clean face before the next pass. A high-GSM microfiber leveling towel folded into quarters provides 8 usable surfaces. Use each surface for one pass, then fold again to a clean face. When all 8 surfaces are used, place the towel in the used pile and take a fresh one. Never return a used leveling towel to the clean pile. Keep the two piles physically separated throughout the application process – opposite sides of the workspace, or use a labeled bag for used towels. The cost of an extra set of microfiber leveling towels is negligible compared to the cost of correcting streaked panels.
Mistake 6: Applying in Direct Sunlight or High Heat
What causes it: The weather is good, the day is clear, and the driveway is available. The garage feels dark and cramped. Applying in the open air on a bright day seems easier than setting up a controlled workspace. The coating goes on the first panel and the results look fine for the first few sections, then the problems compound rapidly as conditions deteriorate.
What actually happens: Direct sunlight heats panel surfaces to temperatures significantly above the air temperature. A hood or roof panel in direct summer sun can reach 130-150 degrees Fahrenheit on a day where the air temperature is 85 degrees. At these surface temperatures, the ceramic coating flash happens in under 60 seconds after application, faster than most applicators can complete a 2 square foot section using careful crosshatch technique.
The coating flashes before it has been evenly distributed across the section. The first area reached by the applicator flashes while the last area is still being applied. Buffing this section is impossible to do correctly, the first area has hardened past the leveling window while the last area has not yet reached it. The panel ends up with high spots in the early-applied areas and correctly leveled areas where the last strokes were applied.
Outdoor application also introduces the dust, pollen, and insect contamination problems described previously in Workspace Preparation. In direct sunlight, these contaminants settle onto the wet coating before it can be leveled and are sometimes pressed into the surface during buffing, where they cure in permanently as raised points in the coating surface.
The fix: Garage or deep shade only, without exception. If a garage is not available, coat in the early morning before surface temperatures rise, working in a deeply shaded area away from open sky. The workspace conditions described previously during Workspace Preparation are not preferences, they are requirements for a predictable result. Any deviation from those conditions introduces variables that no amount of technique can compensate for once the coating is on the paint and the flash window is closing faster than expected.
Mistake 7: Not Using an Inspection Light
What causes it: The garage lights seem adequate. The panels look good in ambient lighting. Adding an inspection light seems like an optional professional extra rather than a practical necessity. This is the mistake that results in completed applications with high spots, bare patches, and missed flash windows that only become visible after the coating cures, when correction requires machine polishing.
What actually happens: The flash signal, high spots, and bare patches in a ceramic coating application are subtle enough in normal ambient garage lighting to be completely invisible to the naked eye. A flash signal that looks like nothing in overhead lighting becomes clearly visible as a rainbow shimmer or surface haze change under a directed LED light at 45 degrees to the panel surface. A high spot that looks like normal gloss in ambient light shows as a distinctly different reflective area under a low-angle inspection light.
Without an inspection light, you are making the most critical timing decision in the entire application process, when to level the coating, based on incomplete information about the surface condition. You are also completing the application without the ability to verify that every section was leveled correctly before moving on, which means defects that are correctable in the moment they occur are not caught until after cure when the correction cost is significantly higher.
The fix: Position an LED inspection light, or a quality LED work light, on a stand at a 45-degree angle to the panel surface before beginning the first section. Every flash check, every post-level inspection, and every end-of-vehicle quality check should be done under this light rather than in ambient garage lighting. The light does not need to be expensive, a bright LED work light available at any hardware store for $20-40 is sufficient. It is the angle and the intensity that matter, not the brand.
How to Fix High Spots If They Occur
High Spot Correction: The Clock Matters
A high spot caught within 15-20 minutes of application takes 5 minutes to correct. The same high spot caught after 48 hours requires machine polishing, IPA wipe, and full reapplication of coating to that area. Inspecting each panel under your LED light immediately after leveling is the most cost-effective quality control step in the entire process.
High spots are the most common correctable defect in a first-time ceramic coating application. They appear where too much product was applied, where buffing happened after the flash window closed, or where the leveling towel was pressed too hard against the surface during leveling. Knowing how to identify and correct them correctly, and understanding the window within which correction is possible, determines whether a high spot becomes a minor setback or a significant rework job.
A. How to identify a high spot:
Under your inspection light, a high spot appears as a localized area with a different reflective quality from the surrounding correctly leveled coating. It typically looks shinier in a slightly different way, more glossy in a hazy, diffuse sense rather than the deep, uniform gloss of a correctly leveled section. In some cases it shows as a faint cloudiness or a slight color tint difference relative to adjacent areas. High spots do not look like obvious streaks or smears; they are subtle enough to miss in ambient lighting, which is exactly why the inspection light is essential throughout the application process.
B. If caught within 15-20 minutes (fresh application):
This is the ideal correction window. The coating in the high spot area has advanced in cure but has not yet reached the point where fresh solvent cannot reactivate it.
Apply 1-2 fresh drops of ceramic coating directly to the suede applicator. Work the applicator lightly over the high spot area using the crosshatch pattern; the fresh solvent in the new product reactivates the partially cured coating in the high spot, returning it briefly to a workable state. Allow the combined product to reach the flash signal, then level with a clean microfiber towel using light pressure. The high spot should level into the surrounding coating correctly with this approach.
Do not apply more than 2 drops to the applicator for a spot correction. The goal is to deposit enough fresh solvent to reactivate the area, not to add a significant layer of new product on top of a partially cured area.
C. If caught within 24 hours (partially cured):
The cross-linking has advanced further than the 15-20 minute window, but the coating has not yet reached full hardness. Fresh product application can still reactivate this surface with a more deliberate technique.
Apply 3 to 4 drops of ceramic coating to a fresh suede applicator. Work the applicator over the high spot area with slightly more pressure than normal application; you are trying to drive fresh solvent into a more advanced cure state. Apply the crosshatch pattern, allow the flash to develop, then buff with a clean microfiber towel using moderate pressure. Follow with a second clean towel pass.
The result in this window will be better than leaving the high spot uncorrected, but may not be as perfectly integrated into the surrounding coating as a correction made within the first 20 minutes. Inspect under the light after leveling. If a slight visual difference remains, accept it, as further product application at this stage risks adding to the issue rather than resolving it.
D. If caught after 48 hours (fully cured):
There is no product-based correction for a fully cured high spot. The cross-linking is complete. Fresh ceramic coating applied over a fully cured high spot bonds to the top of the existing high spot rather than reactivating or dissolving it, adding another layer rather than leveling the existing one.
The only correct method for removing a fully cured ceramic coating high spot is machine polishing with a light compound or finishing polish on a dual-action polisher with a foam cutting or finishing pad. This process removes a microscopic layer of the coating and levels the surface back to the surrounding coating depth. After polishing the affected area, clean with an IPA wipe and reapply ceramic coating to the corrected section.
This is a significant correction process, which is why catching high spots in the 15-20 minute window during application is so much more valuable than discovering them after the coating has cured. The inspection light check at the end of each panel during application is the tool that prevents 48-hour correction work from being necessary.
How Long Does Ceramic Coating Last? (And What Actually Affects It)
This is one of the most searched questions in the entire ceramic coating topic, and one of the most inconsistently answered ones. Marketing copy from coating brands routinely claims 5-10 years of protection from consumer products. Forum posts from frustrated car owners describe coatings that lost their water-beading performance within 6 months. Neither number is fabricated, but neither tells the complete story.
How long ceramic coating lasts is not a fixed property of the product. It is the outcome of three variables working together: the quality of the surface preparation before application, the conditions under which the coating was applied and cured, and the consistency of the maintenance routine that follows. The same coating product applied to two identical vehicles under different conditions of prep, environment, and maintenance will deliver dramatically different lifespans.
Understanding what actually drives coating longevity, not just the marketing claim on the label, gives you realistic expectations and the practical knowledge to get the maximum lifespan from whichever product and application method you choose.
Quick Answer: How Long Does Ceramic Coating Last?
Consumer DIY liquid ceramic coatings last 1-3 years with proper maintenance. Professional installer coatings last 3-7 years. Spray ceramic coatings last 3-6 months. Actual lifespan depends on prep quality, application conditions, and how consistently the coating is maintained after application.
How Long Does Ceramic Coating Last: By Product Type
The most direct answer to this question separates into three distinct categories based on product type and application method.
A. Consumer-Grade DIY Liquid Ceramic Coatings: 1-3 Years
Consumer-grade ceramic coating kits, the kind available for $30-150 at auto parts stores, detailing retailers and online, contain SiO2 concentrations typically ranging from 50-70%. They are formulated to be workable for first-time applicators, with flash windows and leveling characteristics suited to a beginner working alone without professional application equipment.
Applied correctly on properly prepared paint, with a clean cure window and a consistent maintenance routine, these products deliver between 1 and 3 years of meaningful hydrophobic performance and UV resistance. The lower end of that range, 1 year, reflects applications with marginal prep, compromised cure conditions, or inconsistent maintenance. The upper end, 3 years, reflects applications where every stage of the process described in this guide was followed correctly.
The 3-year figure from a consumer product requires effort to achieve. It is not a passive result of simply applying the coating and driving normally. It requires pH-neutral washing on a consistent schedule, regular ceramic booster spray application, immediate removal of bird droppings and tree sap, and avoidance of automatic car washes for the full lifespan of the coating.
B. Professional-Grade Installer Coatings: 3-7 Years
Professional ceramic coatings, like the products applied by certified installers using brands like Ceramic Pro, GYEON Quartz, Gtechniq Crystal Serum and CarPro CQuartz UK, contain SiO2 concentrations of 80-93%. They are not available to the general public through standard retail channels. They require professional training to apply correctly because their flash windows are narrower, their leveling requirements are more precise, and their application tolerances are tighter than consumer-grade products.
The durability advantage of professional coatings comes from two sources. First, higher SiO2 concentration produces a denser cross-linked network with more molecular bonds per unit area to the clear coat surface, a fundamentally more robust protective layer. Second, professional application happens in controlled shop environments with precisely managed temperature, humidity, and airflow conditions that consumer DIY application rarely achieves to the same standard.
Professional-grade coating warranties of 3-5 years are standard in the industry. Claims of 7 years reflect ideal conditions; a controlled application environment, a complete paint correction prep stage, and an immaculate maintenance routine for the full duration. The 7-year figure is achievable, but it represents best-case performance rather than typical outcome.
C. Spray Ceramic Coatings: 3-6 Months
Spray ceramic coatings deposit SiO2 particles on the surface rather than forming a chemical bond with the clear coat. The durability reflects this surface-level nature. Under regular washing conditions with a pH-neutral shampoo, most spray ceramic coatings maintain meaningful hydrophobic performance for 3-6 months from a single application.
The lower end of that range, 3 months, applies to vehicles that are washed frequently in varied conditions, experience heavy contamination exposure, or are parked outdoors year-round in high-UV climates. The upper end, 6 months, applies to vehicles with lower wash frequency, sheltered parking, and moderate contamination exposure.
A ceramic booster spray applied every 3-6 months maintains continuous surface-level protection on a vehicle without an underlying liquid coating. Applied over a liquid coating, the booster extends the liquid coating’s hydrophobic performance well beyond its unassisted lifespan.
Lifespan Comparison at a Glance
| Coating Type | Typical Lifespan | SiO2 Concentration | Application Method | Key Requirement |
|---|---|---|---|---|
| Spray ceramic coating | 3-6 months | Low – surface deposit only | Wash and spray – no prep required | Reapply every 3-6 months |
| Consumer DIY liquid coating | 1-3 years | 50-70% | Full prep and controlled application | pH-neutral washing and booster spray maintenance |
| Professional installer coating | 3-7 years | 80-93% | Certified installer in controlled environment | Full prep, correct cure, consistent maintenance |
The Three Factors That Determine How Long Your Coating Lasts
Marketing language around ceramic coating durability focuses almost entirely on the product; its SiO2 concentration, its hardness rating, its warranty period. These matter. But they account for less of the lifespan outcome than most buyers realize.
The three factors below collectively determine more of your coating’s actual lifespan than the product you chose. A premium professional coating with poor prep, bad cure conditions, and neglected maintenance will underperform a mid-range consumer coating with thorough prep, a clean cure window, and consistent care.
Factor 1: Prep Quality
A ceramic coating is only as durable as the surface it bonds to. This is not a metaphor, it is a direct description of how the chemistry works.
The molecular bonds between SiO2 and clear coat form at specific bonding sites on the clear coat surface. When those sites are contaminated with polish oils, brake dust residue, clay bar lubricant traces, or fingerprint oils, the SiO2 cannot bond directly to the clear coat in those areas. It bonds to the contaminant instead. The contaminant is not a stable, long-term molecular structure. It degrades. When the contaminant it bonded to degrades, the coating bond in that area degrades with it.
This manifests as patchy coating performance 6-18 months after application, certain areas maintain strong water beading while adjacent areas show reduced or absent hydrophobic response. It manifests as early delamination in areas with the highest contamination load at the time of application, typically panel edges, lower body panels, and areas around glass seals where contamination concentrates.
Poor prep does not necessarily produce a coating that fails immediately. It produces a coating that performs at a reduced level from day one and reaches the end of its functional lifespan significantly earlier than the same product would achieve on a properly prepared surface.
Every hour spent on surface preparation in Phase 1 of this guide, the wash, iron decontamination, clay bar, paint correction and IPA wipe, is an investment that pays back in months of additional coating lifespan. Cutting the prep short cuts the lifespan proportionally.
Factor 2: Application Conditions
The temperature, humidity, and environmental cleanliness of the workspace during application and the 24-48 hours of initial cure directly affect the density and completeness of the SiO2 cross-linking network in the finished coating.
i) Temperature effects on lifespan:
Cross-linking is a temperature-dependent chemical process. The reaction rate, the speed at which SiO2 molecules form bonds with each other and with the clear coat, increases with temperature within the optimal range. Within the 60-75 degree Fahrenheit application range, the cross-linking proceeds at a rate that produces dense, consistent molecular bonding throughout the coating depth.
Application in cold conditions below 50 degrees Fahrenheit produces a coating where the cross-linking reaction is slowed to the point of incompleteness in the lower coating layers during the curing period. The surface cures correctly, it has adequate air circulation and temperature. The deeper layers, closer to the clear coat interface, form fewer bonds per unit area because the reaction rate is suppressed by cold throughout the cure window. The result is a coating with a correctly cured top surface and an incompletely bonded lower layer, which reduces the adhesion strength at the clear coat interface and shortens overall lifespan.
Application in high heat above 85 degrees Fahrenheit produces the opposite problem. The upper layers cross-link extremely rapidly during the flash window, forming a dense network faster than the solvent can evacuate uniformly. This can trap residual solvent in the middle layers of the coating, creating micro-zones of incomplete cure that reduce coating hardness and chemical resistance in those areas.
ii) Humidity effects on lifespan:
Water molecules that contact the coating during the flash and initial cure stages compete with SiO2-to-clear-coat bonding chemistry. In high-humidity conditions above 60% relative humidity, moisture in the air continuously contacts the wet coating during the flash stage. The cross-linking that forms in high-humidity conditions contains more water-interrupted bond sites than the same coating applied in controlled humidity, producing a finished coating with lower bond density and reduced chemical resistance compared to a coating cured below the humidity threshold.
iii) Environmental cleanliness effects on lifespan:
Dust particles, pollen, and garage debris that land on the coating during the flash stage and are leveled into the surface by the buffing towel do not simply sit on top of the cured coating. They are incorporated into the coating layer at the point where they contact the surface. As these particles eventually release from the coating under the stress of washing, UV exposure, and thermal cycling, they leave micro-voids in the coating structure, small breaks in the continuous SiO2 network that reduce overall coating integrity and create points of early degradation.
Factor 3: Maintenance Routine
A correctly applied, well-cured ceramic coating that receives poor maintenance will underperform its rated lifespan in predictable ways. The maintenance routine does not just keep the coating clean, it actively preserves the integrity of the SiO2 surface layer that delivers the coating’s hydrophobic and protective properties.
i) pH-neutral washing every 2 weeks:
The SiO2 surface layer that provides hydrophobic performance has a specific chemical composition that alkaline products attack directly. Car shampoos with high pH, alkaline wheel cleaners used near painted panels, and automatic car wash detergents are all mildly to moderately alkaline. Repeated exposure to alkaline chemistry gradually strips SiO2 from the surface layer of the coating, not all at once but progressively, washing after washing.
A vehicle washed exclusively with pH-neutral shampoo retains its SiO2 surface layer at close to its original density for the full rated lifespan of the coating. A vehicle washed periodically with alkaline products loses its hydrophobic performance measurably faster, sometimes cutting the rated lifespan by 30-50% depending on the alkalinity of the products used and the frequency of exposure.
Washing every 2 weeks serves a second function: it prevents contamination from bonding permanently to the coating surface. Bird droppings, tree sap, and industrial fallout that accumulate on the coating surface begin their chemical interaction with the SiO2 layer over time. Regular washing removes these contaminants before their etching chemistry progresses to the point of causing surface damage.
Alkaline Products Are the Fastest Way to Shorten Your Coating’s Life
Alkaline car shampoos, automatic car wash detergents, and wheel cleaners used near painted panels attack the SiO2 surface layer of your ceramic coating with every exposure. A coating rated at 2 years with pH-neutral care can lose 30-50% of its functional lifespan from regular alkaline product exposure. Check every product that contacts your coated surfaces.
ii) Ceramic booster spray every 3 to 6 months:
The SiO2 surface layer of a ceramic coating degrades from the top downward through a combination of UV exposure, washing abrasion, and chemical contact. The cross-linked SiO2 network closest to the air, the outermost surface layer, experiences the most environmental stress and degrades first. Below it, the coating retains its structure and its bond to the clear coat. Above it, the hydrophobic performance diminishes as the density of intact SiO2 at the surface decreases.
A ceramic booster spray applied every 3-6 months deposits a fresh layer of SiO2 onto the existing coating surface, partially replenishing what environmental degradation has removed. This does not add durability to the underlying bonded coating, but it maintains the hydrophobic performance of the surface layer at close to its original level throughout the coating’s lifespan.
The practical effect of consistent booster spray application is straightforward: a coating maintained with a booster spray every 3-6 months shows strong water-beading performance at the 2-year mark that closely resembles its performance at 3 months post-application. The same coating without booster maintenance typically shows noticeably diminished water-beading at the 12-18 month mark, even if the underlying coating bond remains intact.
iii) Avoiding automatic car washes:
Brush-based automatic car washes create micro-abrasion damage in the SiO2 surface layer of the coating during every visit. The rotating brush contact generates friction that physically removes SiO2 from the coating surface at a rate that is meaningfully faster than the slow environmental degradation of hand washing. A ceramic-coated vehicle that uses a brush automatic car wash monthly will show noticeably diminished coating performance within 6-12 months regardless of the quality of the underlying application.
Touchless automatic car washes use alkaline detergent chemistry that, as described above, attacks the SiO2 surface layer. Monthly touchless car wash visits produce coating degradation at a rate approximately 2-3 times faster than a consistent pH-neutral hand wash routine. For a coating rated at 2 years with correct care, monthly touchless car washes can reduce the functional lifespan to 8-14 months.
Signs Your Ceramic Coating Is Approaching the End of Its Lifespan
Ceramic coating does not fail suddenly. It degrades gradually, and several observable signs indicate when the coating is nearing the end of its functional protection period:
- Reduced water beading: The most obvious sign. Water that previously beaded into tight, high-contact-angle droplets and sheeted off at speed begins to bead more loosely and cling to the surface at lower speeds. Apply a ceramic booster spray and reassess. If water beading recovers strongly after the booster, the underlying coating is still intact and the surface layer simply needed replenishment. If water beading remains diminished after a booster application, the underlying coating is degrading.
- Increased contamination bonding: When the coating was fresh, bird droppings and road grime released easily with minimal effort during washing. If contamination is beginning to bond to the surface and requires more pressure or dedicated cleaning products to remove, the SiO2 surface layer has degraded to the point where its release properties are significantly reduced.
- Loss of gloss depth: A correctly cured ceramic coating adds a measurable depth and clarity to the paint’s reflective quality. As the coating degrades, the paint surface gradually returns to its pre-coating appearance, still clean and reasonably glossy, but without the same depth of reflection that the coating produced when it was intact.
When all three signs are present simultaneously, the coating has likely reached the end of its functional lifespan and the vehicle is a candidate for decontamination, paint inspection, and reapplication.
Maintaining Your Ceramic Coating After Application
Applying the ceramic coating correctly is the investment. Maintaining it correctly is what protects that investment for the full duration of the coating’s rated lifespan.
Most car owners who experience disappointing results from a ceramic coating, reduced water beading within the first year, a coating that looks no better than wax by month 18, or early contamination bonding on surfaces that should still be releasing dirt easily, trace the problem back not to the application but to the maintenance. The coating they applied was fine. The care routine that followed was not.
Ceramic coating maintenance is not complicated. It does not require expensive products, specialized equipment, or significant time beyond what a regular car wash already demands. It requires consistency with a small set of specific practices and the avoidance of a small set of specific mistakes. Both lists are short. The difference in outcomes between following them and ignoring them is measured in years of coating lifespan.
This section covers every maintenance practice your ceramic coated car needs, and gives you the reasoning behind each one so you understand why it matters, not just what to do.
Wash Every Two Weeks with pH-Neutral Shampoo
Regular washing is the single most important maintenance habit for a ceramic coated vehicle. It is also the one most car owners underestimate because it sounds too simple to be the deciding factor in coating longevity.
Two weeks is the correct interval for a daily driver in typical conditions. This is not an arbitrary number. It reflects the average rate at which airborne contamination, road spray, bird dropping exposure, and environmental fallout accumulate on a vehicle surface to the point where they begin their chemical interaction with the coating’s SiO2 surface layer. Washing at the two-week mark removes contamination before that interaction causes surface damage. Extending the interval beyond two weeks allows contamination to begin etching and bonding, which requires more effort to remove and leaves micro-damage in the coating surface that compounds over time.
In conditions where contamination accumulates faster, like coastal environments with salt air, areas with heavy industrial fallout, periods of heavy pollen or vehicles parked under trees regularly, shorten the wash interval to weekly rather than biweekly.
A. Choosing the right shampoo:
pH-neutral means a pH value of approximately 7, neither acidic nor alkaline. Car shampoos specifically labeled as pH-neutral, coating-safe, or ceramic coating compatible are the correct products for maintaining a coated vehicle. They clean effectively without the alkaline chemistry that strips SiO2 from the coating surface during washing.
Products to avoid entirely on a ceramic coated vehicle:
Dish soap is one of the most alkaline substances regularly used on cars by owners who assume it is a safe, cheap alternative to car shampoo. Dish soap is formulated with powerful degreasing surfactants designed to cut through cooking oils and food residues. These surfactants are aggressive enough to strip SiO2 from a ceramic coating surface in a single wash. One wash with dish soap can visibly reduce water beading performance for weeks afterward.
All-purpose cleaners used at full strength on painted surfaces carry similar risks. If you use an APC for wheel cleaning or trim cleaning during a wash, keep it away from coated painted panels.
Standard car wax shampoos that include wax additives in the formula deposit a wax film over the ceramic coating surface. This film temporarily improves gloss but clogs the SiO2 surface texture that provides hydrophobic performance. Wax-infused shampoos reduce the coating’s water-beading effectiveness with every use.
B. Wash technique matters as much as product choice:
Use the two-bucket wash method throughout the maintenance life of the coating. A contaminated wash mitt dragged across a ceramic coated surface introduces fine scratches into the SiO2 layer that, while less damaging than on bare paint, accumulate over hundreds of wash cycles and gradually reduce the coating’s surface smoothness and hydrophobic contact angle.
Rinse the vehicle thoroughly before contacting it with a wash mitt. A pre-rinse that removes loose surface debris reduces the contamination load on the mitt during washing and minimizes the abrasive contact between trapped particles and the coated surface.
Dry with a clean, large microfiber drying towel or a dedicated car dryer blower after each wash. Allowing the vehicle to air dry deposits mineral water spots on the coating surface from the calcium and magnesium in tap water. On a ceramic coated surface, water spot minerals bond more slowly than on bare paint, but they still bond if left to dry repeatedly without removal. Over dozens of wash cycles, mineral deposits from air drying accumulate into a film that gradually dulls the coating’s reflective quality.
Never Use Automatic Brush Car Washes
This is the maintenance rule that the coating marketing industry mentions politely and the professional detailing industry states plainly: automatic brush car washes and ceramic coatings are incompatible for the lifespan of the coating.
The reason is not complicated. Automatic brush car washes use rotating cloth strips, foam rollers, or bristle brushes that contact the vehicle surface at speed under motor-driven pressure. The friction generated by this contact on a ceramic coated surface is abrasive, not in the obvious sense that leaves visible scratches from a single pass, but in the cumulative sense of micro-abrasion that removes SiO2 molecules from the coating surface with each wash visit.
A brand-new ceramic coating has a dense, intact SiO2 surface layer that provides strong hydrophobic performance and chemical resistance. After 6 months of monthly brush car wash visits, that surface layer has been physically abraded to a fraction of its original density. The coating appears intact on visual inspection, it has not delaminated or peeled. But its functional performance is significantly reduced because the surface layer that provides hydrophobic and protective properties has been worn away faster than normal environmental degradation would produce.
The micro-abrasion from brush contact also introduces fine swirl marks into the coating surface that become visible under direct light after several months of use. These swirls are in the coating, not in the paint beneath it, but they affect the visual quality of the surface and create increased surface roughness that accelerates contamination bonding in subsequent weeks.
Automatic Brush Car Washes Will Shorten Your Coating’s Life
The friction from rotating brushes physically removes SiO2 from the coating surface with every visit. Six months of monthly brush car wash use can reduce a 2-year coating to the performance level of a 6-month-old coating. No maintenance spray corrects this damage after it occurs. Avoid brush car washes entirely for the full lifespan of the coating.
What about touchless automatic car washes?
Touchless automatic car washes are a different situation. They use high-pressure water and chemical detergents without physical contact, so they do not create the physical abrasion damage that brush washes produce.
The concern with touchless washes is the chemistry of their detergents. Touchless car wash systems use significantly more concentrated and aggressive cleaning chemistry than hand wash shampoos, because they need to release contamination without the mechanical assistance of physical contact. Many touchless wash detergents are moderately to strongly alkaline, necessary for their cleaning function, but harmful to the SiO2 surface layer of a ceramic coating under repeated exposure.
Occasional touchless car wash visits, when hand washing is genuinely not possible, are not catastrophic for a coated vehicle. Monthly touchless car wash use as the primary maintenance method will visibly reduce coating performance within 12-18 months. If touchless washing is occasionally necessary, follow it with a pH-neutral rinse aid or a quick spray of ceramic detailer spray to help counteract the alkaline chemistry residue.
The correct standard for a ceramic coated vehicle is a regular two-bucket hand wash with pH-neutral shampoo. Everything else is a compromise that costs coating lifespan at a quantifiable rate.
Apply a Ceramic Booster Spray Every 3-6 Months
The SiO2 surface layer of a ceramic coating degrades gradually from the outside inward. UV exposure, washing cycles, environmental chemical contact, and thermal cycling all remove SiO2 from the outermost surface of the coating over time. The cross-linked bonding layers deeper in the coating remain intact and continue protecting the clear coat beneath them, but the surface hydrophobic performance diminishes as the outermost SiO2 density decreases.
A ceramic booster spray, also called a ceramic maintenance spray, ceramic topper, or SiO2 boost spray, partially replenishes this surface layer. Applied to a clean, dry coated vehicle every 3-6 months, it deposits a fresh layer of SiO2 onto the existing coating surface that restores water-beading performance to close to its original level and extends the period before the underlying coating needs full replacement.
i) How to choose the right interval:
Apply a booster spray when you notice that water beading has noticeably softened. A freshly cured ceramic coating causes water to bead into tight, high-contact-angle droplets that roll off the surface with minimal slope. As the surface layer degrades, water droplets become larger, lower-contact-angle, and less likely to sheet off at moderate speeds. When this change becomes clearly observable during a wash rinse, the surface layer needs replenishment.
For most vehicles in regular use with correct washing practices, this point arrives around the 3-month mark after application or the previous booster application. In high-UV climates, like in Arizona, Texas, Southern California andFlorida, the degradation rate is faster, and a 3-month interval is appropriate from the beginning. In moderate climates with regular indoor parking, 6 months between booster applications is often sufficient to maintain strong performance.
ii) How to apply a ceramic booster spray correctly:
The application process for a ceramic booster spray is significantly simpler than the original liquid coating application. No clay bar, no IPA wipe, no flash window monitoring, and no strict environmental requirements.
Wash the vehicle thoroughly with pH-neutral shampoo and dry completely before applying. Do not apply booster spray to a wet or damp surface, the water prevents the SiO2 in the booster from contacting the coating surface directly, producing uneven coverage.
Spray 3-4 pumps of the booster product onto a clean microfiber applicator pad. Spread across one panel at a time using overlapping strokes, working the product evenly across the full panel surface. After 30-60 seconds, buff with a clean, dry microfiber towel using light pressure and flip to a fresh towel face after each panel.
The vehicle can be used normally immediately after the booster spray application is complete. There is no cure window or extended dry time required.
iii) Use a booster spray compatible with your coating brand:
Most major ceramic coating manufacturers produce a companion booster or maintenance spray formulated specifically for their coating chemistry. Using the manufacturer’s own booster product on their coating is the safest compatibility choice. Third-party booster sprays are generally compatible with most SiO2-based coatings, but check the product description for compatibility language before using a third-party product on a premium coating system.
Remove Bird Droppings and Tree Sap Within 24 Hours
Bird droppings and tree sap are the two most urgent contamination types for a ceramic coated vehicle, more urgent than any other surface contamination encountered in normal driving and parking conditions. Understanding why they demand immediate removal, not just eventual removal, helps you take the 24-hour window seriously.
i) Bird droppings:
Bird droppings are highly acidic, pH values between 3.5 and 5 depending on the bird’s diet. On bare paint without coating protection, bird droppings can etch permanently into clear coat in as little as 1-2 hours on a warm, sunny day. Ceramic coating creates a protective barrier that significantly extends this window, on a fully cured coating in good condition, bird dropping etching typically takes 8-12 hours to progress to the clear coat surface. In hot conditions or direct sun, the timeline shortens. In cool conditions or shade, it extends.
The 24-hour removal guideline accounts for the range of conditions under which a coated vehicle might be parked. It is a conservative window that keeps you safely ahead of the etching timeline in the majority of real-world situations. Treating bird droppings as a 24-hour urgent item rather than something to address at the next regular wash is the habit that prevents etching damage from accumulating across the coating’s lifespan.
ii) Tree sap:
Tree sap carries a combination of organic acids and resinous compounds that bond to surfaces through a different mechanism than bird droppings. Where bird dropping damage is primarily acid etching, tree sap damage is adhesive bonding, the sap polymerizes on the coating surface over time, becoming progressively harder and more deeply bonded. Fresh tree sap that has been on the surface for a few hours removes with minimal effort. Tree sap that has been on the surface for a week or more requires significantly more aggressive removal chemistry and physical effort, and in some cases, light paint correction, to address completely.
How to remove bird droppings and tree sap without damaging the coating?
Do not wipe bird droppings or fresh tree sap across the coating surface. The debris in bird droppings, like seed fragments, grit particles and hardened material, is abrasive enough to create fine scratches in the SiO2 surface layer when dragged across it under a wiping motion. Tree sap pulled across the surface before it has been softened can create similar drag marks.
The correct removal technique is blotting, not wiping.
Spray a dedicated ceramic coating-safe detailing spray directly onto the bird dropping or tree sap deposit and allow it to dwell for 30-60 seconds. The detailing spray softens and lubricates the contamination, suspending it from the coating surface. Then place a clean, folded microfiber towel over the softened deposit and press gently, do not move the towel laterally. Lift and inspect. The majority of the contamination should have transferred to the towel face. Repeat with a fresh towel section if any material remains. Follow with a light wipe of detailing spray using a clean microfiber towel to remove any residual discoloration or residue.
For dried or hardened bird dropping that has been on the surface for more than 12 hours, increase the dwell time of the detailing spray to 2-3 minutes and place a damp, folded microfiber towel over the deposit for the full dwell time to rehydrate the material before blotting.
Keep a Detailing Spray in Your Car
The 24-hour bird dropping removal window means you need to be able to act when you are away from home. A small bottle of ceramic coating-safe detailing spray and 2-3 folded microfiber towels kept in the glovebox or boot of the car means you can address a bird dropping correctly within minutes of finding it – regardless of where you are parked.
Additional Maintenance Practices Worth Following
- Avoid parking under trees during the first two weeks of cure and minimize it throughout the coating’s lifespan. Trees deposit sap, bird droppings, and organic acids from decomposing plant matter onto surfaces beneath them continuously. A ceramic coated car parked under a tree regularly accumulates contamination at a rate that demands more frequent washing and increases the urgency of the 24-hour removal window for organic deposits.
- Use a pH-neutral wheel cleaner on coated wheels. If you coated your wheels as described before under “Applying Ceramic Coating to Wheels“, the same alkaline-product avoidance applies to your wheel cleaning routine. Use a pH-neutral wheel cleaner or your standard pH-neutral shampoo for wheel cleaning. Acid-based wheel cleaners, commonly used on uncoated alloy wheels because of their effectiveness on brake dust, attack the ceramic coating bond on coated wheel surfaces.
- Do not apply wax or traditional sealant products over the ceramic coating. Wax and polymer sealants do not bond correctly to SiO2 surfaces. They sit on top of the coating, temporarily filling the SiO2 surface texture that produces the hydrophobic contact angle. This reduces rather than enhances the coating’s water-beading performance and creates a wax film that attracts contamination faster than the clean SiO2 surface beneath it. The only products that belong on a ceramic coated surface during maintenance are pH-neutral shampoo, ceramic booster spray, and ceramic coating-compatible detailing sprays.
- Schedule an annual inspection under a good light source. Once a year, take 20 minutes to inspect every panel of the coated vehicle under a strong directed light source in a dark environment. Look for any areas showing different reflective quality from adjacent panels, any areas where water beading has diminished relative to surrounding surfaces, and any visible contamination that regular washing has not fully addressed. Catching these early allows targeted booster spray application or professional spot correction before the issues spread.
Ceramic Coating Maintenance at a Glance
| Maintenance Task | Frequency | Product to Use | What to Avoid |
|---|---|---|---|
| Full wash | Every 1-2 weeks | pH-neutral, coating-safe shampoo | Dish soap, alkaline shampoos, wax shampoos |
| Ceramic booster spray application | Every 3-6 months | Manufacturer-compatible SiO2 booster spray | Wax, polymer sealant, non-compatible products |
| Bird dropping and tree sap removal | Within 24 hours of contact | Ceramic-safe detailing spray – blot, do not wipe | Dry wiping, abrasive materials |
| Wheel cleaning | With each full wash | pH-neutral wheel cleaner or standard shampoo | Acid-based wheel cleaners on coated wheels |
| Full coating inspection | Annually | LED inspection light in dark environment | Automatic car washes before or after inspection |
| Touchless automatic car wash | Emergency use only | Rinse with pH-neutral spray after if possible | Brush-based automatic car washes entirely |
How to Know Your Maintenance Routine Is Working
A correctly maintained ceramic coating shows three consistent characteristics throughout its rated lifespan that confirm the coating is performing as intended.
Water beads tightly and sheets off at low vehicle speeds during rain or after rinsing. The contact angle of water on the surface, how spherical and high-sitting the beads are, remains strong with occasional booster spray application. If water beads remain consistently spherical and mobile on the surface, the SiO2 surface layer is intact and your maintenance routine is working.
Contamination releases easily during regular washing without requiring dedicated fallout removers, strong agitation, or specialized chemistry for routine dirt and road film. If your weekly wash with pH-neutral shampoo and a soft mitt leaves the car looking clean without significant scrubbing effort on most panels, the coating’s anti-bonding properties are functioning correctly.
The paint retains its gloss depth and reflective clarity between washes without visible contamination accumulation within the first 4-5 days after washing. A correctly maintained ceramic coating extends the clean appearance period significantly compared to uncoated paint or waxed paint. If the car looks noticeably dirty within 3-4 days of washing consistently, the surface contamination bonding rate suggests the coating has degraded to the point where a booster spray or professional assessment is warranted.
Frequently Asked Questions About Applying Ceramic Coating at Home
Can You Apply Ceramic Coating Yourself at Home Without Professional Help?
Yes, modern consumer-grade ceramic coating kits are specifically designed for DIY application and are used successfully by first-time applicators every week. The prep work required before coating, like clay bar decontamination, optional paint correction and the final IPA panel wipe, demands more time and careful attention than the coating application itself. With the right workspace, the correct tools, and a willingness to follow the preparation steps without shortcuts, a first-time home applicator can achieve a result that lasts 1-3 years.
What Are the Steps to Apply Ceramic Coating Correctly?
Applying ceramic coating correctly follows a specific sequence that cannot be reordered or shortened without affecting the final result. Here are the seven essential steps in the correct order:
- Wash the car with a pH-neutral, wax-stripping shampoo using the two-bucket method, do not use regular car soap or dish soap
- Decontaminate the paint with an iron remover spray followed by a clay bar treatment to remove all bonded surface contamination
- Correct the paint with a dual-action polisher and finishing polish if swirl marks, fine scratches or light oxidation are present; coating over defects seals them in permanently
- Wipe every panel with isopropyl alcohol diluted to 15-20% using a clean microfiber towel to remove all polish oils and residues before coating
- Apply the ceramic coating in a crosshatch pattern across sections no larger than 2 square feet using a suede applicator loaded with 4 to 6 drops of product
- Wait for the flash signal, a faint rainbow shimmer visible under your inspection light, then immediately level the coating with two clean, dry microfiber towels using light overlapping strokes
- Keep the car indoors, dry, and sheltered for a minimum of 24-48 hours while the coating completes its initial cure, and avoid car washes for 7 days
What Ruins or Destroys Ceramic Coating?
The most common causes of early ceramic coating failure are water contact within the first 24 hours of application, repeated use of alkaline cleaning products during maintenance, and automatic brush car washes that physically abrade the SiO2 surface layer with each visit. Inadequate surface preparation, specifically skipping the clay bar decontamination or the IPA panel wipe before coating, causes weak bonding at the clear coat interface that leads to patchy performance and significantly reduced durability within the first year. Even a correctly applied, well-cured coating degrades substantially faster than its rated lifespan without a consistent pH-neutral wash routine and ceramic booster spray application every 3-6 months.
Is Ceramic Coating Easy to Apply for a Beginner?
The coating application step itself is straightforward, apply in a crosshatch pattern, watch for the flash signal, level with a clean microfiber towel. The preparation that makes that application bond correctly and last is where the real challenge lies for first-time applicators. Washing, iron decontamination, clay bar treatment, paint correction if needed, and the final IPA wipe together account for 4-6 hours of the total process and directly determine whether the coating delivers 6 months of performance or 3 years.
How Long Does Ceramic Coating Last After a DIY Application?
A correctly applied consumer-grade DIY ceramic coating typically lasts between 1 and 3 years depending on product quality, the thoroughness of the surface preparation, and the consistency of the maintenance routine that follows. Applying a ceramic booster spray every 3-6 months and washing exclusively with pH-neutral shampoo extends the functional hydrophobic lifespan significantly toward the upper end of that range. Professional-grade coatings applied by certified installers using higher SiO2 concentration formulas under controlled conditions last 3-7 years.
How Do You Apply Ceramic Coating Spray Specifically?
Spray ceramic coatings are applied after a thorough wash and complete drying of the vehicle, no clay bar treatment, paint correction, or IPA wipe-down is required. Spray 2-3 pumps of the product onto a clean foam or microfiber applicator pad, spread across one panel at a time using overlapping strokes, and buff with a clean dry microfiber towel after 30-60 seconds. Spray ceramic coatings are significantly easier to apply and more forgiving than liquid ceramic coatings but provide shorter protection, typically 3-6 months per application compared to the 1-3 years delivered by a properly applied liquid coating.
Final Verdict: Should You Apply Ceramic Coating at Home?
Yes. Absolutely. Without reservation, if you give the preparation the time and attention it requires.
Every section of this guide has returned to the same point from a different angle because it is the point that determines every outcome in DIY ceramic coating: the coating itself is not the variable, the prep is. A first-time applicator who washes correctly, decontaminates thoroughly, wipes with IPA before touching the coating, works in a clean enclosed garage at the right temperature, and monitors the flash on every panel will produce a result that looks professional and lasts 2-3 years. The same applicator who skips the clay bar, rushes the IPA wipe, and applies on a warm driveway in the afternoon sun will spend a Saturday with a machine polisher undoing the work before starting over.
The most expensive mistake in DIY ceramic coating is not buying the wrong kit. It is rushing the preparation and discovering the result requires correction, which costs more in time, product, and effort than doing it correctly the first time.
If you are ready to do this: use the complete tools and materials checklist, confirm your workspace meets every condition, and block out two full days minimum – one day for thorough preparation, one day for application and initial cure. Do not compress this into a single afternoon. The coating deserves the full process, and so does the vehicle you are protecting.
If you are still deciding between ceramic coating and traditional wax as your paint protection approach, the full breakdown of every real-world difference, durability, cost over time, application requirements, and which product is right for which type of car owner, is covered in our dedicated comparison guide: car wax vs ceramic coating.
If you want to understand the full science behind what ceramic coating is, how it bonds to clear coat at the molecular level, and whether it is genuinely worth the investment for your specific vehicle before committing to an application, start with our complete guide on what is ceramic coating, the first article in this cluster and the most thorough overview of the product available for everyday car owners.
The process in this guide works. Follow it completely. The result will speak for itself on the first rainy drive after the coating reaches full cure.